Outer Island Project: The
Sequel
Page 3
|
|
This probably should've been discussed way up front at the
beginning of the project, but you get what you pay for around here.
I shop for wood year 'round, whether I have a project going on or not,
because it's not always easy to find good clear suitable lumber with nice
color variations. I'd guess that maybe one in five visits to a lumber yard
actually results in a purchase, and even then sometimes it's only one
board.
I don't care what the dimensional size of the lumber is, I'm just
looking for good clear suitable wood with as little waste as possible. If
there's a bonanza of good stuff, then selection is based on lightest and
darkest colors, and lightest weight.
This involves sorting and sifting through stacks and stacks of lumber,
and it's done just as you fear; there's no easy way to do it. I am careful
to leave the stacks as neat, or neater, than I found them not only out of
common decency, but also because inconsiderate jackasses cause many lumber
dealers to prohibit hand-picking due to chaotic messes left behind.
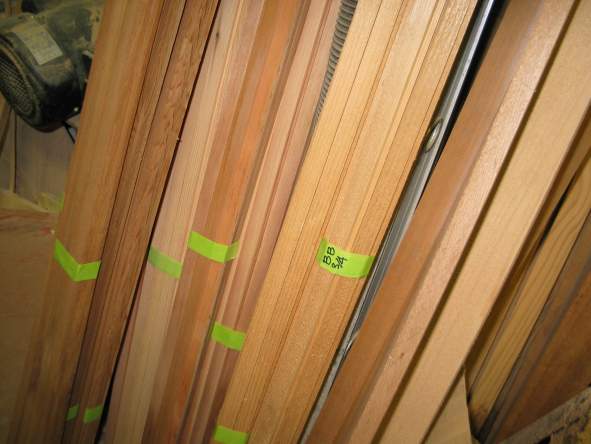
After milling into finished strips that are ready to use, each board is
bundled and taped to maintain color consistency. Note the nice color
contrasts; it's all western red cedar found in home improvement stores. |
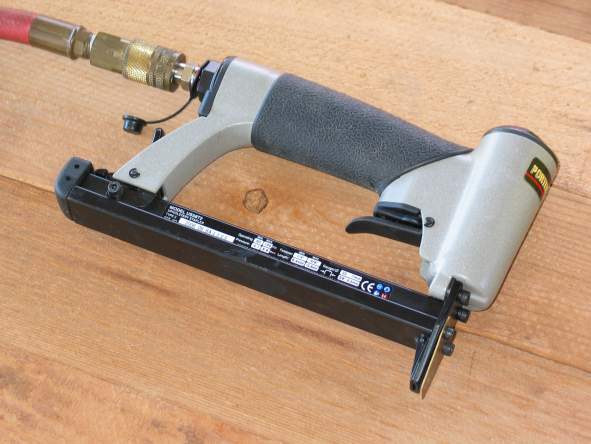
| I got the idea for a pneumatic staple here: http://www.kayakforum.com/cgi-bin/Building/index.cgi
Jury is out on how I like it, but all indications so far are that I
shall call it a keeper. In the meantime, it's wicked fun to take target practice on the trash can. You can
go through some staples getting carried away, but I'm not worried; the
smallest package of staples I could find contains like ten billion, and
cost less than fifteen bucks. A small price to pay for relieving tension
by pretending you're shooting at a lumber stack messer-upper dude.
Update: It's a keeper, no question about it. The staples are
slimmer and daintier than hardware store staples; very little pressure is required to
fire 'em, so is a lot easier on the ol' carpal tunnel syndrome and makes placement
more accurate. The rows of staples are planted
very consistently and the crowns stand proud of the surface perfectly thanks to the
added brass
space, which makes their eventual removal much easier.
The acid test for tools around here is: if something were to happen to
it, would I replace it, and if so, how quickly? Answer for the air
stapler: yes, and promptly.
Porter-Cable Model US58T2 Upholstery Stapler.
|
 |
 |
When you enjoy Eskimo rolling as much as I do, no way can
you have just a plain-jane bottom on your boat. I mean, there needs to be
something for peanut gallery loiterers to look at when you're hanging out
upside down. Also, the woodworker in me can't help but see all that
available real estate as a blank canvas. So . . .
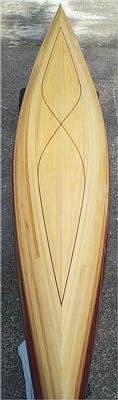
Ever since I saw this picture several years ago I've been impressed,
and, in a word, been wanting to shamelessly rip off the great idea. It's
an elegantly simply-stated pinstripe design that speaks to me, so now's my
big chance to have a similar one of my very own. I wish I could give
credit to whoever posted it on the Guillemot KBB, but dang, it was a long
time ago and I have trouble recalling what was for breakfast this morning.
In the best tradition of boat builders who shamelessly rip off other
boat builders' ideas, I modified mine ever so slightly slightly so I could
act like I'm halfway original. I kind of pinched the ends to make it look
more tear droppy . . . but to tell the honest truth, I still like the
original better. Oh well.
|
|
Since it's a rather subtle feature, I want to make sure the wood
used for the stripe is of maximum contrast.
I thought of walnut first, for a nice chocolate-dark stripe, but there
were problems: I want the selected wood to be lightweight, since that's my
obsession and this boat is intended to weigh less than forty pounds, and
also be soft enough to match sanding characteristics of the surrounding
cedar and avoid humpy-lumpy issues. Basswood fills the bill nicely, and
being at the polar opposite end of the color range isn't a problem with my
medium-hued cedar background.
Then, I started out wanting a 1/4"-wide strip so the feature would
stand out boldly, but it turned out to be too thick to take the bends
necessary. After a bit of "R&D", 1/8" was settled on.
At this point a philosophical debate might be entered upon as to whether I
was forced into settling for something other than what I had envisioned,
or if I took a more artistic approach and allowed the project to whisper
its own desires into my ear, and I was being sufficiently open and
sensitive to receive the messages. Probably the former, but the latter
sounds better. Anyway, we're getting a 1/8" wide pinstripe feature.
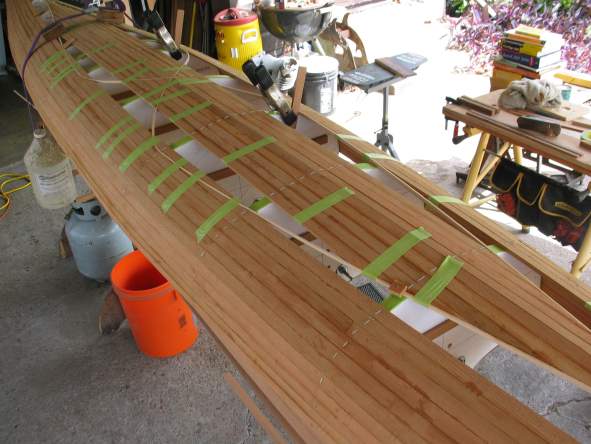
Here it is being laid out.
|
 |
|
|
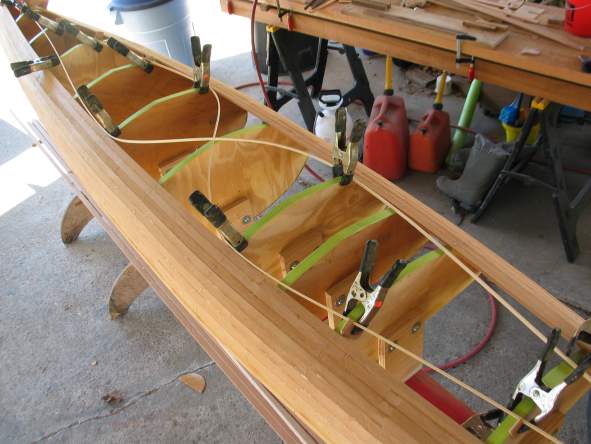
And here it is being filled in with strips.
If you look carefully in the upper left of the photo, you can see
straps laid over the hull, and a gallon jug of epoxy dangling from it.
There's one on the other side as well. It's doing the same thing as
discussed and illustrated here
on my Merlin Canoe pages, ensuring that all strips lay snug to the
forms with extra vigilance owing to lack of continuity due to the feature
patterns. |
|
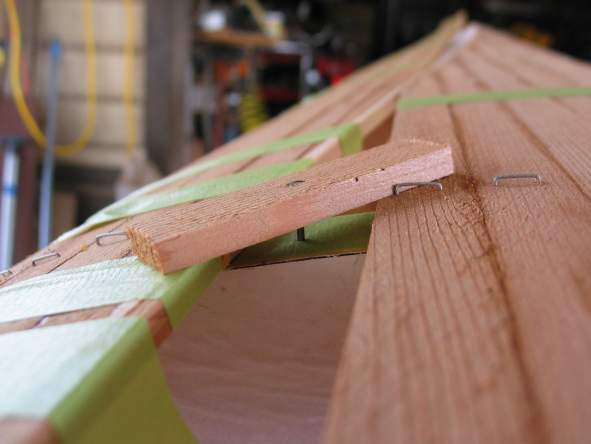
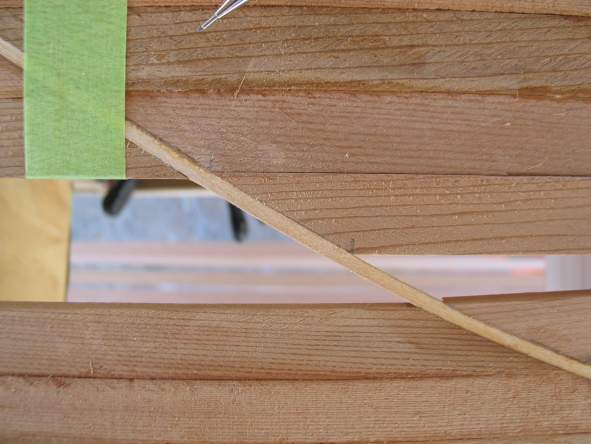
Here's another way of ensuring same, when conditions
permit. A bit of scrap strip is simply nailed to the form while bridging
the two shores. It is pulled out after the glue sets, so the ensuing
strips may be laid in its place. |
 |
Fitting Strip Ends
As with all else in boat building, there's infinitely more than one way to
skin any particular cat. The following - and the preceding, for that matter -
only represents my way. As always, do whatever works best for you.
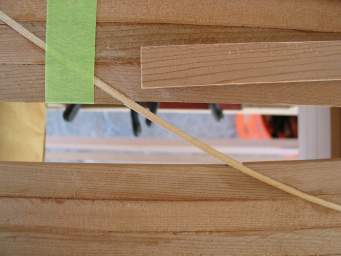 |
Here's the deal: we want to make the square end of the strip fit in the
pointy slot. There's lots and lots of this to do in strip building, so may as well
get used to it. And get used to it you will, for there will be ample
opportunity to practice. Those first
few may take some time to get looking good, but you'll soon be needing only a minute or
two for the job. Be prepared to experience a lot of fun and satisfaction
in becoming skilled at it. |
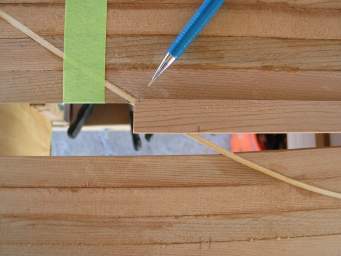 |
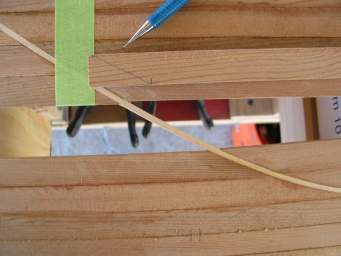
Take care to line up the strip accurately, just as it will be installed,
then mark the "toe" and the "heel" of the taper with
tic marks.
Always think of the two points as the toe and heel so you can talk to
yourself intelligently.
That last note may sound a little strange, but come on, it isn't like building your own kayak out of ten million little strips
is the epitome of normal. The fact that you're studying this makes it
pretty clear that you're slowly, inexorably, losing it, so just relax and
enjoy the ride.
I often use the end of the strip as the toe mark, but only when the
wood is clean and undamaged. Here, I'm backing
off a little way to ensure good wood condition all the way to the extreme
point. |
 |
Play a little game called Connect The Dots. |
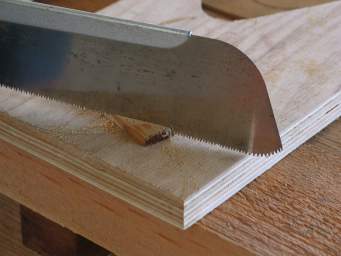 |
Cut outside the line. Cutting inside the line can lead to
colorful verbosity that family, friends, pastors, neighbors, etc.,
might possibly disapprove of. |
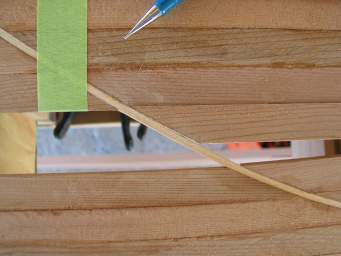 |
Here's the freshly sawed-off strip held in place. If you get
a magnifying glass and look at your screen real close you'll see there's a slight gap
at the bottom of the joint-to-be. At this point I begin talking to myself,
and say things like "okay, let's trim the toe end, about halfway to
the heel." |
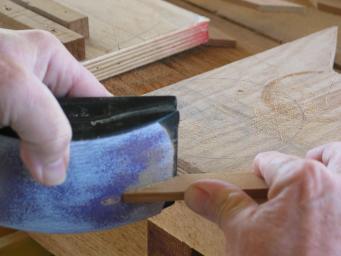 |
And then I work the toe end and leave the heel alone. Using
terminology to self like this helps a great deal keeping it straight in my head which
part of the taper I need to tweak as I shuffle back and forth between boat
and workbench.
It's always great fun to find you've inadvertently taken a bit off the
wrong end, speaking of things that can lead to colorful language usage.
|
|
Nuthin' to it. This particular operation took about one
minute. |
 |
Notes on marking wood: There are two common
mistakes greenhorn cabinet shop apprentices make over and over: Applying too
much pressure to the pencil when making measurement marks, and applying too
little lead when marking out guide lines. When marking to a ruler or tape
measure, begin drawing the tic mark lightly, with very little pressure with the
pencil point, and gradually apply more to darken it so it's easily seen. The
effect is sort of like delicately brushing the mark on. This avoids the frequent
problem of having the pencil point bumped off course by grain ridges, saw marks,
and things like that. When tracing around a pattern, or drawing along a
straightedge, go over it several times so you leave a firm, distinct, dark line.
Wimpy faint lines lead to oh-shits on a regular and consistent basis, so make 'em
crisp, dark, and very visible. An old draftsman's technique for consistently
sharp lines is slowly rotating the pencil as line is drawn, keeps tip from
flattening and widening.
In all cases, avoid using such pressure that the pencil plows furrows into
the wood surface, for somebody shall have to sand them out eventually. Go over
it several times instead, and "paint it on". If the lead in your
pencil is too hard to make a dark line without getting all groovy about it,
trash it and get a softer one.
I prefer Pentel mechanical pencils with .7 mm size lead in HB grade lead for
shop pencils. Pencils and lead come in a single package at Office Depot, et al.
Rewind to Home Page
Rewind to Page 2
You Are Here: Page 3
Fast Forward to Page 4
Fast Forward to Page 5
Fast Forward to Page 6
Fast Forward to Page 7
Fast Forward to Page 8
Fast Forward to Page 9