The deck rigging scheme has been bouncing around in my head for quite a while now, and I finally decided to apply what I've sort of kind of settled upon. It may stay this way or not, just gotta look at it and decide if I like it or not.
Outer Island Project: The Sequel
Page 9
In The Home Stretch!
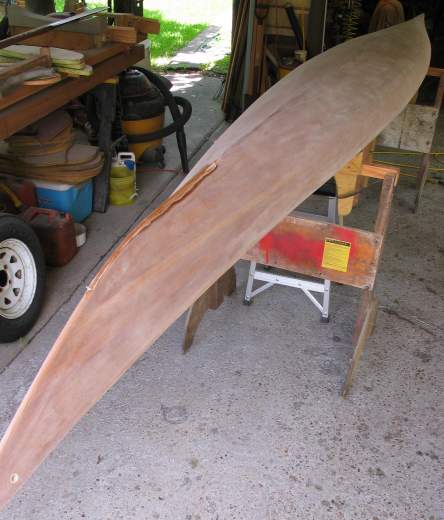
| While epoxy hardens in 24 hours, it isn't totally cured;
that takes anywhere from several days to three weeks or longer, depending
on a variety of factors including hardener used, ambient temperature,
etc., etc. So I've been putting off any real progress for a week or more,
just puttering around trying to look busy.
The deck rigging scheme has been bouncing around in my head for quite a while now, and I finally decided to apply what I've sort of kind of settled upon. It may stay this way or not, just gotta look at it and decide if I like it or not. |
|
| Looks kind of busy, doesn't it? Not sure I like so much crap
on deck, but that's the point of this little exercise: to see what flies
and what don't. Here's what you're looking at:
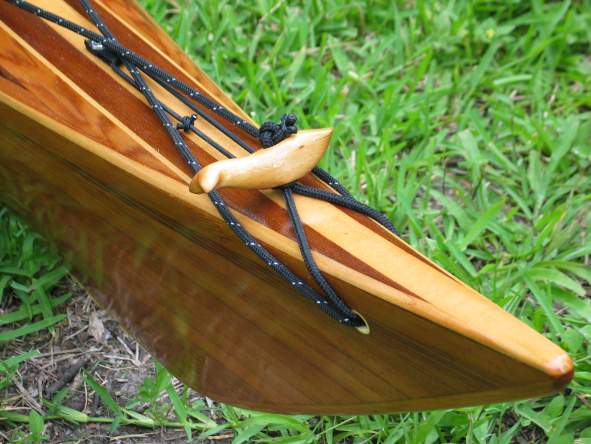
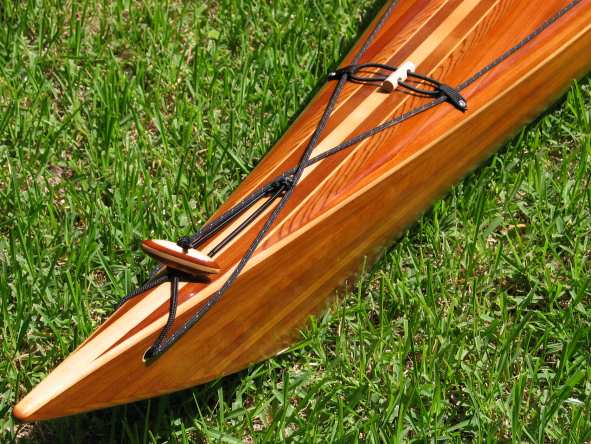
Since I paddle rough water as a rule, my bow and stern spend lots of time immersed in roiling water; so lift toggles and rope loops that hang freely have never looked desirable to me. I really like the ones on my Valley Nordkapp LV, so I'm using a very similar approach here. The toggle handle is attached to the boat primarily with 3/16" multibraid lifeline rope, and then the whole thing is retained in tension by a 3/16" bungee so it won't flop around. The life lines are the 1/4" reflective braided stuff that costs like a million bucks a foot. The 3/16" bungee loop a little further aft is designed primarily to accept rod tips, whereas I occasionally carry a rod and reel or two on the foredeck. That's why it has the toggle; to keep the cord off the deck so I can ease a rod tip under it from way back in the cockpit. The two pairs of 1/4" bungees closer to the cockpit are proven performers on several boats now, and my scheme of choice as derived from long experience on the water. Much handier, generally speaking, than the X-patterns you usually see. Another Caldeira original.... |
 |
|
|
Dang, it was looking pretty decent there for a while,
wasn't it? Kind of a drag that you gotta take all that stuff back off and
mess it up good so you can apply the final finish, but that's just life in
the ol' woodshop.
I decided I have waited long enough, time to varnish, so off we go....... |
Milestone: June 21, 2010: Ummm, I Think I May Be Finished....
(Can It Really Be?)
| I seem to have run out of stuff to do. I wish I could lay down a decent coat of varnish, but I've given up. Can't be done. I'm hopelessly ham-handed when it comes to that stuff. So the deck rigging goes back on, and very soon I shall try applying a coating of something else . . . . like good old salt water! | 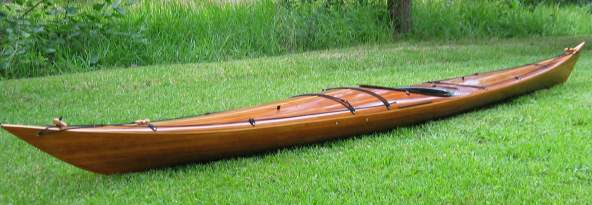 |
|
|
The bottom looks equally hideous. But that's okay, I'll just keep it immersed in the sea. A few may see it when I'm upside down, but that'll just have to be their problem. |
| I switched toggles while you weren't looking. The forward lift toggle is a sperm whale, and the fishing rod tip holder toggle is a sea otter. All critters are impressionistic, hand whittled from basswood, lots of fun to make. | 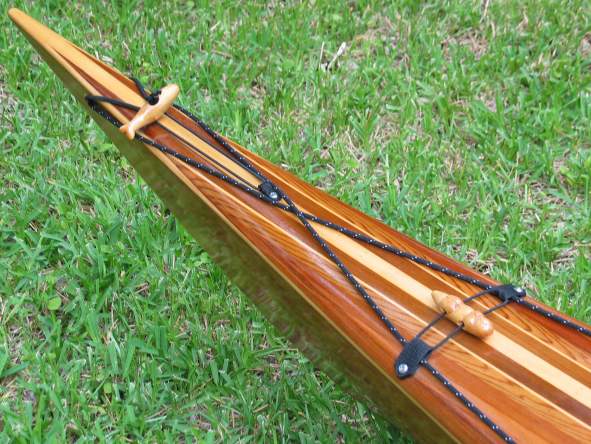 |
|
|
The stern lift toggle is a happy blue whale. Just look at that grin! |
| Paddle holders are very important! Here is the patented John
Caldeira/Kurt Maurer combination paddle park and sponge holder. Yes, the
paddle park bungee is a complete loop, see below....
The minicell block behind the seat is to keep it in place temporarily while I work out the optimal seat position. The spare paddle holder on the aft deck was designed to hold both a two-piece Euro paddle, and my faithful little stormy. With any luck at all, no Euro paddle will befoul this deck.... |
 |
|
|
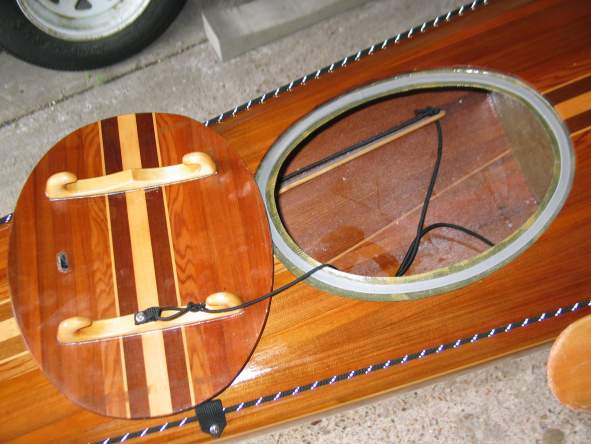
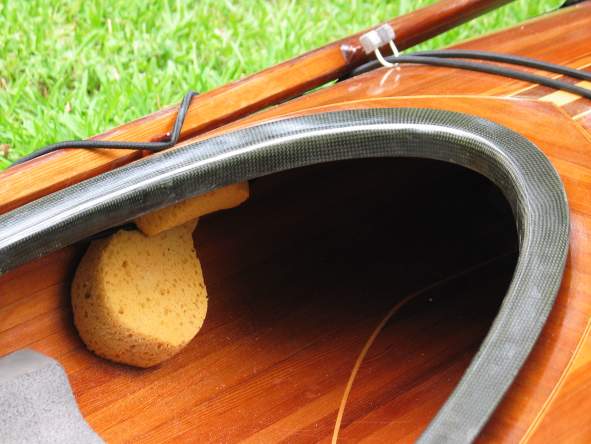
The hatches are tethered.
Note the hooks, and bungee anchor rails inside. The one-piece hook pairs serve multipal purposes; you only have to glue two, instead of four; they maximize glue area so they won't pop off; they serve as stiffeners that help the hatch covers retain their proper curvature. The rails do likewise; you only have to glue in two instead of four, and glue area is maximized so they won't pop loose either. Even with all those precautions, it should be noted that the tension required to maintain a watertight seal is surprisingly light. It is much more effective to build your hatch parts accurately than try to rely on lots of pressure from the bungees. In any case, I'm mighty wary about a failure in this particular department. If you can imagine that. |
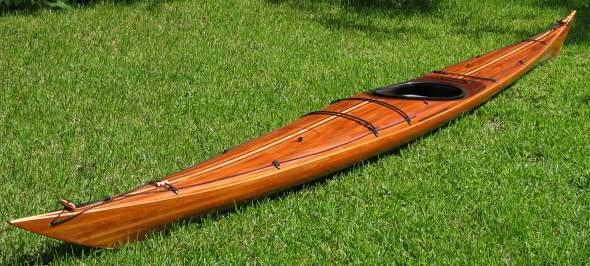
Finished weight is 30.5 lbs. Yes, that's 30.5 lbs. I weighed it three different times on my digital shipping scale to make sure I was reading it right. I am delighted to say the least. This is not an ultra-light lay-up; it's 4 oz s-glass inside and out for the hull, with doublers all along the football. For the deck it's 4 oz s-glass for the interior with doublers around the cockpit area, and 3.25 oz e-glass topsides. There are Dynel wear strips on both stem and stern. To help save weight I've done things like fitting carved cedar blocks for the bow and stern instead of doing end pours, using ten-inch Yakima foot braces instead of the full length ones, and basically just any other little thing I could. It's like the old adage about money: if you watch your nickels and dimes, the dollars will take care of themselves. 30.5 lbs -- why, I have astounded myself!
|
And finally, she is officially commissioned. When I install a sponge inside, and a homemade nose clip in the deck bungees, you know I mean business. In the spirit of the relaxed tempo of this entire project, I shall patiently await the morrow to take her to my favorite put-in and let her do some real boat stuff. I expect it to be a very enjoyable little outing.
|
 |
Update: September 16, 2010: Yep, finished, commissioned, and in routine use.
(It's true -- boat projects really can get finished!)
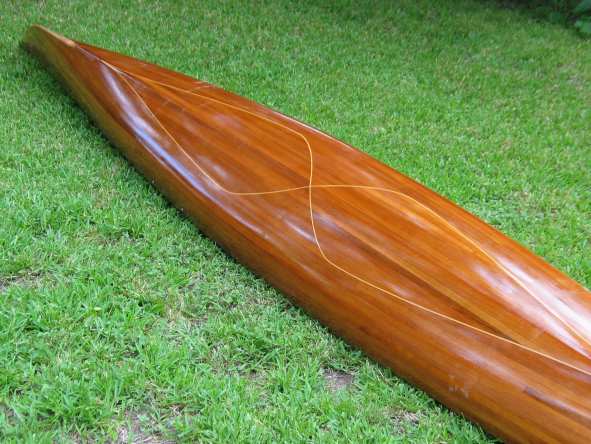
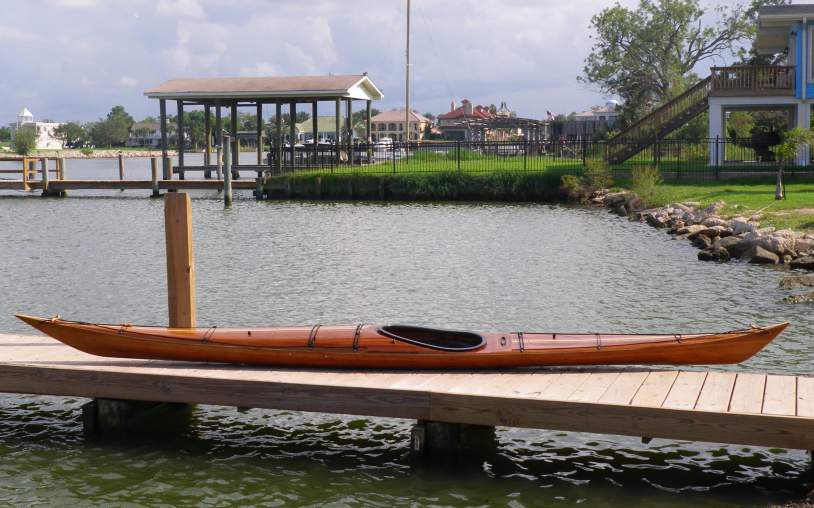
Dang it, I keep meaning to add a few neato action shots of the finished product, but can never seem to get any pictures that are worth a hoot so I keep putting it off. But here's a sweet profile shot taken in mid-September, after she's been in use for a coupla-few months. There's no question about it, this boat and I are best friends now, I paddle 'er daily weather permitting, and she is everything and more I hoped for. I love the Outer Island because it just does EVERYTHING well; it handles big water well, is pure joy on flat water, rolls very famously, hauls ass very fastly, and just tears it up in the beauty department. I'll add more cool stuff like actual pictures whenever I get some, which surely will happen sooner or later. Until then, thanks for tuning in!
|
|
| This is where I launch most often. We're on the Kemah-Seabrook Channel, which connects the entire Clear Lake watershed to Galveston Bay, so there is every conceivable sea adventure possible within a short paddle from this boat ramp. I've been launching various types of boats right here since the seventies when I was just a kid. The place has changed a lot, none of those casas grandes used to be there. But it's still a wonderfully interesting place for boating, and just ten minutes from my driveway. |
Update: Halloween Day 2010: I still haven't gotten any cool action photos, but here are a few more pics trickling in as I think of things I want to add to this little production......
|
|
Got a couple things I'd like to discuss here.
First is wood selection. I try to never use anything but good old
Western Red Cedar because it's so perfect for boat building. Basswood
comes close, however, and I used for the center
stripe and two pinstripes because finding very light
colored cedar has been impossible lately. The two dark strips on either side of the
center stripe are from a nice chocolate colored cedar board I reserved for
just such occasions as this.
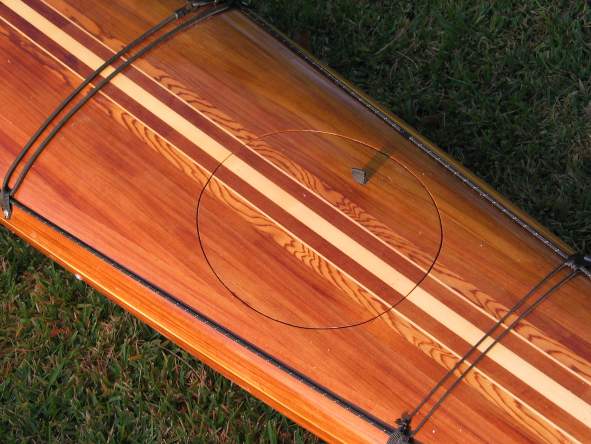
Which brings us to a cool feature I enjoy pointing out to interested parties: the next two courses of strips outboard of the pinstripes are from the same board. Yes, the "tiger-striped" and "regular" strips next to 'em are from the same board; the only difference is that one is plain-sawn and the other quarter-sawn. See next photo, below, for more on this. Then, all deck strips are "book matched". Want some good advice? Always take the most care with your foredeck, because that's what you're going to be looking at when you're paddling. Note the "soft padeye" installed to help pull the hatch lid up. Align the loop fore-n-aft to prevent splashing. This works better than anything else I've tried to make popping hatches as easy as it's ever going to get. Oh, and drill tiny vent holes in the bulkheads too. Finally, ever since I built it, I've been wondering if I ought to have added two more pinstripes between the tiger stripe and regular field strips for an emboldened center stripe design. What do you think? |
| I buy 2x4, 4x4, 4x6, etc., lumber that's sold for building
decks and the like, never even look at "one-by" material because I want
100% control over width, thickness, and edge condition of 100% of my
strips. Inconsistencies in
final strip dimensions lead to additional work, and any experienced
woodworker will tell you it's just a lot easier to do things correctly at
the earliest possible point.
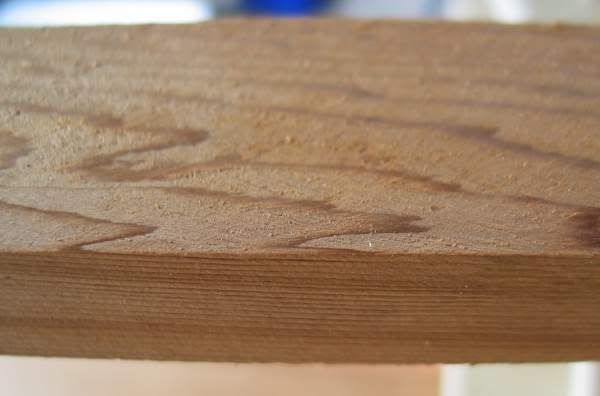
Here, a 2x4 was cut to yield pieces that measures precisely 3/4" thick by whatever wide. The top face of this piece is what's known as "plain sawn", with its coarse grain features; and the side edge, at bottom of photo, is what we call "quarter sawn", with its fine tight grain. You can see how my strips are about to be ripped now. Plain sawn strips can look cool, but like knots*, can give trouble too. Problem is, plain sawn faces tend to sand out "wavy" because the wood goes from soft to hard to soft between the light and dark bands. Getting a varnish-ready surface takes extremely careful sanding, usually by hand with a fairing board, and still requires fill coats of epoxy to completely even out. I would use more plain sawn strips if it weren't for this problem. I mean, challenge. * Knots can sponge up epoxy and cause starved cloth spots, and concentrated resins within knots can cause delamination problems with the 'glass. It doesn't always happen, but certainly can. Ask me how I know...... |
|
|
Above: Wide face of board is "plain sawn", the narrow face is "quarter sawn". |
You Are Here: Page 9
Return to the Sawdust Factory Table of Contents
Email Kurt Maurer at NGC704@aol.com