Outer Island Project: The Sequel

Page 2


Here's genuine photograph of the patented Sawdust Factory Scarf & Bevel Jig, as crafted in about five minutes from genuine Sawdust Factory Scrap Wood. Sure beats tossing stuff in the trash can, eh?

On the left side are two scarf cutting jigs, which are essentially just task-specific miter boxes. A couple of 3/4" x 3/4" pieces of scrap are nailed to the base board, and then an angle cut is made very carefully with the pull saw with true vertical orientation being the aim. You only have to be so careful the one time, after that it's the jig's job to ensure easy and accurate repeat cuts.

On the right is the bevel jig. Nail one 3/8" or so strip to the base board, then a second using one of your cedar strips as a width gage.

All done, nuthin' to it. Now let's put it to work.......


I do not like bead and cove, I think it's one of those short cuts that takes twice as long. The advantages you get from it are dubious at best, and outright sabotage at worst. If you like 'em, forget what I just said and sluff it off as one man's opinion to which he is entitled. If you agree with me, then yippee. If you're undecided, then I hereby wish you luck in separating fact from fiction and arriving at your own conclusion. In any case, the soundest advice is:

Do what works best for you.

Anyway, here's why we're having this discussion: This next strip doesn't want to fit very well, see that edge gap? The square edge needs some sort of modification in order to lay flush with its neighbor, or else we're never going to get a useable glue bond. And it ain't gonna to be no bead & cove, either...


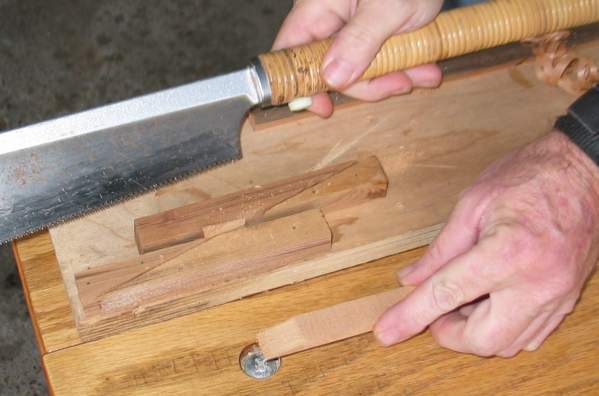
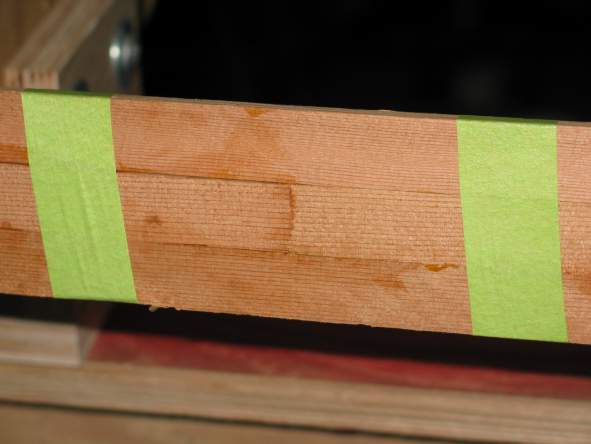
So we lay the strip in the beveling jig so it is held edge-up, then use a block plane to whisk a bevel on it.

Unless it's a pretty radical curve you're fitting to, the bevel is typically going to be so slight as to be almost indiscernible. The natural tendency is over-bevel, and it's not much better than no bevel since the edge gap is merely moved to the inside of the curve, where you don't see it . . . until later. So it's best to err on the side of not enough bevel, then you can always take a bit more off to get a proper fit. Remember the old saw: It's always easier to take some more off than put some back on.

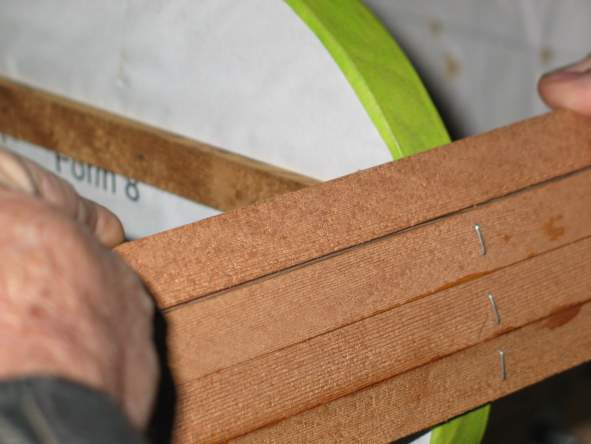
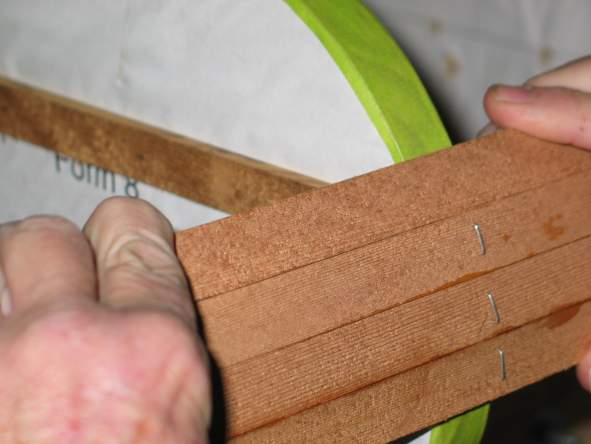
Work in two-foot segments, using forms to measure. I'll hold the strip in place, see about how much bevel I need between a couple forms, and then using where my fingers are holding the strip as a marker, lay the strip in the jig with that part centered and hit it with the plane. Rinse and repeat as necessary.

This works like everything else in boat building: It's slow and tedious at first, but with practice comes speed and efficiency. Take all the time you need to get a good fit, and don't worry if it takes a freakin' hour; you'll soon require only a few minutes for each course of strips, and it's even fun.

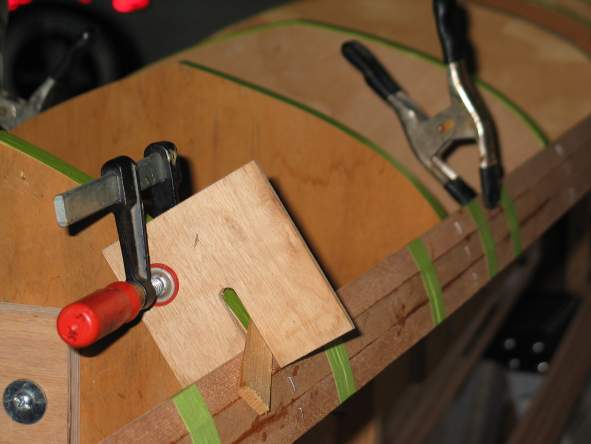
Note the 25-lb bag of bird shot draped over the brace on the work stand. It makes the lightweight stand feel solid as a full size workbench. Get a couple bags at a sporting goods store that deals in gun stuff, they're handy as heck. And if you look closely, just below the bag-o-shot lies a leveling shim (shallow wedge). It takes any wobble out of the stand. 

Suffering wiggle and wobble in your work benches and stands is Epic BS. The fastest, surest, and easiest way to make giant strides towards expert woodworking is dealing with it.


Behold the result. Much better. Life is sweet.  


I have never used a full-length strip in my life, and wouldn't want to. 8-footers are actually my preferred length since they're easy to handle, although in the end I'll take any size lumber that's clear enough to yield a good crop of strips. 14-foot strips are the longest I normally ever see.

But here I'm building an 18-foot long boat, so I'm going to have to use a strip stretcher. I call it a scarf jig since it causes cuts that are perfect for making scarf joints. Scarf joints are ramped, or angled, joints that maximize the glue bonding area of the two pieces to be wedded so the marriage will be a long and prosperous one.

With any luck at all, the photo explains everything so I can quit typing about it right here.


If you pay attention to your strip selection, the results will be nearly invisible. This is a previously executed scarf joint now overlaid with the next strip course.

The green tape is applying clamping pressure to the freshly glued in  topmost strip, to help make the bond tighter and more secure over its entire length. It will be removed before the next course of strip is added, which in turn will get like treatment.

If you hold your first strip-built boat up over your head in broad daylight, chances are you'll see plenty of sunlight peeping in through myriad small gaps. It's okay; the boat is still structurally sound. But as you increase the number of boats you build, so shall you decrease the number of such gaps.

 Green 3M Scotch Tape is just exactly like the more popular blue tape, except for one little thing: It stretches. This makes a world of difference, enabling it to be used for curvy masking or stretchy clamping. Beats me why blue tape is even made at all.


We interrupt this program for a brief editorial!

In the past couple years it has become trendy and fashionable to be appalled at the very idea of scarf joints and staple holes creeping in and ruining your project. Yes, I'm talking about the staple-less method of stripping. I can't imagine where, when, or how the desire for a flawless machine-made look came into vogue, but to it I say: Bee-Ess! One of the chief points of this whole exercise is to end up with boats that do NOT look like they were stamped from a mold, and all the little maker's marks that go into them only add glory to the overall texture and depth of visual interest, and do not detract from it. In my mind, it is a lot easier to take a little extra care to line up the staples as you shoot 'em in, than to slow down progress by using none at all, and end up with a finer finished look in the bargain. Same goes for scarf joints; working with shorter strips is just a million times easier all the way around, and the resulting scarf joints only reward the closer inspection with details of patient hand crafting, not dreadful instances of imperfect horror. Give a little complication to the look of the finished craft where it adds coolness; don't complicate the process to add blandness. If you disagree strongly, we encourage you to put together a kayak and/or canoe building web site of your own and post your opinion to the contrary.

Thank you, we now return you to our regularly scheduled broadcast.


The photo at right shows a couple noteworthy things happening: In the background, a spring clamp mashes a curing scarf joint in the latest course of strip. (Generally speaking, the topmost strip is the latest one added. Got that? Good.) The green tape on either side of the joint ensures that all bonds snugly.

Now's a fine time to be mentioning it since it's way too late, but when you're milling your strips it really pays to be exceedingly careful to keep strip width and thickness as constant and consistent as humanly possible. This ought  to be a really good example of why if you think about it.

Note the Little Square Thingy in the foreground; sometimes strips don't want to lay snugly against one form or another as they ought. There's only one reaction worth having to such rebellion, and that is to insist. So the Little Square Thingy with its slot feature is clamped to the form, and the recalcitrant strip is given a wedgie. Problem solved.

They're easy to make and infinitely handy to have; for instance, I also use 'em to hold strips to the forms loosely while fitting the bevel and stuff like that, kind of like extra hands. Cut a mess o' 3" x 3" pieces of cheap doorskin plywood, stack a bunch together, drill a hole in the middle of the stack. Then saw in a line from one edge to the holes, do it again, and presto: a fistful of Little Square Thingies. I tend to keep a dozen and a half on hand, they get along nicely with spring clamps too.


Any woodworker knows there's no way you'll ever have enough, let alone too many, clamps. But clamps tend to be kind of pricey, so you never go to the clamp store and load up. So here's a handy-dandy tip for acquiring a pleasing compliment of clamps for your shop: Make sure to buy one or two every time you go to Home Depot or WoodCraft. It doesn't cost too much that way, and in a year or two you'll have an impressive array. Also, never, ever buy old fashioned C-clamps. Always get bar style clamps as seen above, or anything with a quick-set feature of some sort or another. That'll keep you from wasting bunches of time just, um, well, screwing around.


Here's another handy-dandy shop tip, this one straight from Jay Babina, designer of the boat I'm building now. Tape a small piece of scrap wood to the glue bottle nozzle to act as a guide. That's it. Makes laying down a bead of glue on a strip's edge ten billion times easier.


I put this plug in my Merlin pages, but feel compelled to repeat it here . . . and everywhere else, for the matter, it's that good: 

The Shinto rasp. Worth its weight in gold. Whenever I show it to a visitor and let 'em have a go with it, another one gets sold. It's way handy for all woodworking, not just boat building. Takes off wood like nobody's business without clogging and leaves an astonishingly good surface behind that's ready for sanding. One side is coarse, the other fine. Up close it looks like it's made of hacksaw blades.

They're available at all woodworking tool purveyors, but I prefer to get mine from CLC since John Harris personally introduced me to it. In fact, I get lots of my stuff from CLC. I love that outfit, and recommend 'em to noobs and veterans alike. About $30.


Back to Home Page 

You Are Here: Page 2

Fast Forward to Page 3

Fast Forward to Page 4

Fast Forward to Page 5

Fast Forward to Page 6

Fast Forward to Page 7

Fast Forward to Page 8

Fast Forward to Page 9