Outer Island Project: The Sequel

Page 7


Making fiberglass hatch gasket sills out of fiberglass, with a couple twists. 

This is going to be basically the same technique Vaclav Stejskal shows on his superb One Ocean Kayaks web site, in the Workshop section (as always, many thanks go to Vaclav for all his generous help so freely given to all of us!)

Twist Number One: This stroke of genius comes from my friend John Caldeira (me, I never have any of those, I just have strokes): Instead of cutting out the hatches and then taping them back in place for the sill molding process, "tab" them instead. Or in other words, just cut 'em almost out, and leave about one inch worth of uncut tabs in four places evenly spaced around the hole-to-be. After molding the sills has been completed, then cut 'em out the rest of the way.

If you've ever made hatch sills this way before, you'll instantly see the beauty of this idea that's so simple and elegant it practically requires an oracle to come up with it. And if you can't be smart yourself, then try to make smart friends, I always say.


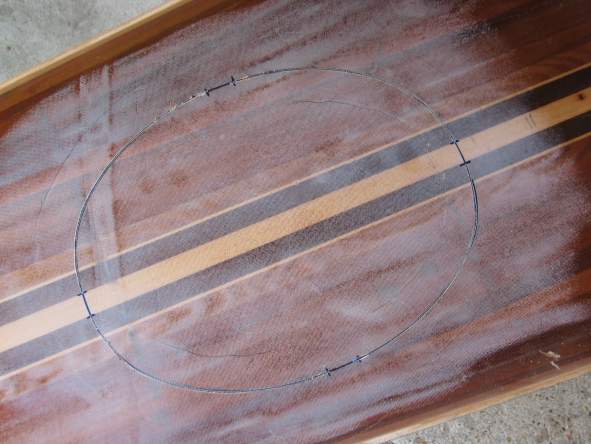
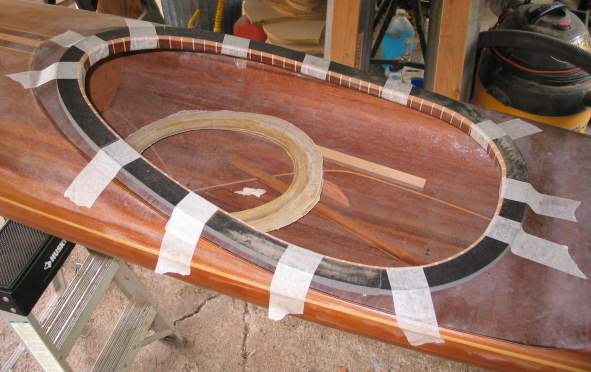
The conventional wisdom is to lay down your sacrificial gasket material, then lay in thickened epoxy fillets around 'em to help the glass cloth drape over 'em, and that's what I started to do. But it's just too dang heavy! If you want results that'll never see forty pounds, and prefer mid- to low-thirties, you simply refuse to accept any excess weight you can possibly do without. So I pulled the weatherstrip back out, pitched the batch of dookie-schmutz, and started over. I hate to waste stuff, but this is going to be around for a long time and I'd just as soon get it right.

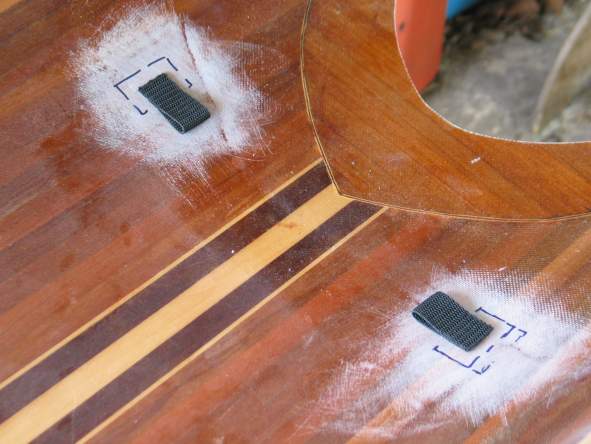
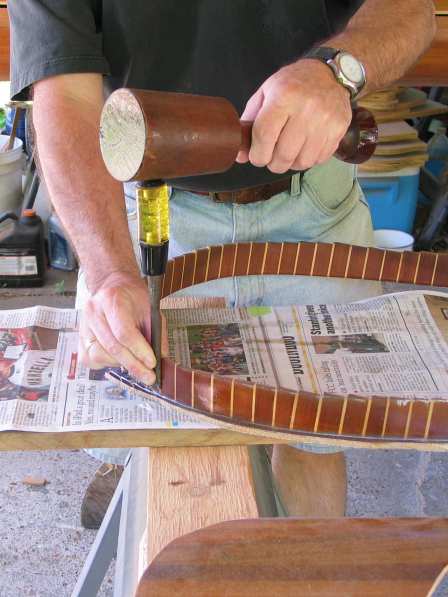
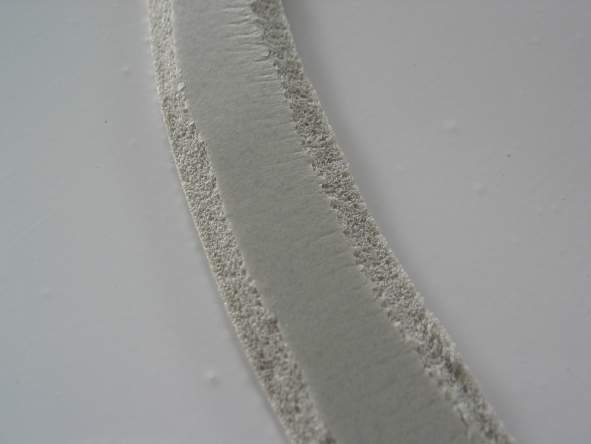
Which brings us to Twist Number Two:

Instead of epoxy fillets, I laid down some wider weatherstrip, then used old fashioned double-edged safety razors to bevel the foam gasket itself. You need an insanely sharp blade to pull this off, and those relics of the past, which continue to be readily available at the local grocer's, fill the bill.

I have no idea why they were called "safety" razors; they're feloniously dangerous any way you slice 'em .... so to speak. I mean, does anybody really shave with those things anymore, or are they all being sold to people like me, who use them to trim deer hair flies for fly fishing? I tell ya, I'm old enough to remember those things well; they were often kept in the same drawer as the styptic pencils . . . remember those? No? Well, they're little white pencil sticks that you rub on the nicks from the safety razor to stop the bleeding. And when you touch 'em to the wound, wowee, it stings like you held a wasp to your face. Boy, now them's was the good old days, fun, fun, fun.

In the meantime, if there's a way to draw blood with a Mach 3, I have yet to discover it. Safety razor my foot.

What? You say you came here to hear about boat building? Stop interrupting. . . . 


Whoops, ADD kicks in, another topic switch without warning!

It's another genuine John Caldeira brainstorm being installed: The underdeck bungees. I find them so incredibly handy I went back and installed 'em in every kayak I own. He uses his for a bilge pump, but it's the handy-dandy water bottle caddy for yours truly.

You're looking at the under-side of the deck here, just forward of the cockpit, and that's why I feel so free to clearly mark locations with a Sharpie. The next time an epoxy job comes along, I'll use a little of it to stick these webbing loops in place. 

The webbing loops are easy to make. Just cut a length, fold over, heat paired edges with a Bic lighter, mash with pliers immediately to weld 'em together, work in plier-wide segments. Less than one minute per loop, ready to install.


Maybe I'll come back and talk about this sometime when I get a little more time, but the short of it is that I've been commissioned to build a 9-foot propeller for a Fokker D.VII, and only have a few weeks to "get-r-done". So once again the boat project is rudely shoved aside to languish...........

I hate that. But this is too much fun, who can resist?


Hint: boat and paddle making has proven to be the most excellent training imaginable for propeller carving.


Speaking of aviation, check out those wings. OMG. Somebody needs a haircut.


The prop gets an epoxy seal coat, and while it cures I sneak in a little quality OI time.

Remember that coaming riser I installed, then cut out so I could install a recess? Well, since summer is fast approaching and building time is turning out to be so limited, facing the task of building a new riser just felt obnoxious; especially since it seems like I just did that, and didn't even get to use it! So I grabbed this old hunk of scrap I just happened to have laying around, and took it to the band saw to liberate this riser that just happened to be stuck to it.....


.....Then used a chisel and mallet to knock off the old fillet.....


.....Then plugged it right in to the new recess hole, and laid down some new fillets. Presto! A two-hour riser! There are some things about it I'm not totally thrilled with, but tough tooties - this project needs to go forward, and that's all there is to it. I'm gettin' tired of messin' around here.


Yep, tired of messing around ...... gonna really buckle down and git-r-done ..... yep.....

So three weeks later we're back on the project ..... sigh. For today's episode we're gonna make a coaming lip, or rim. Here, I've spun up one of my patented eight-lamination beauties, this time out of basswood and redwood left over from that propeller job. It somehow fails to come out as well as I think it should've, but it's passable. Except for one thing. It's not low enough. Recognize the familiar theme? Hey, the Outer Island a is a superb rolling boat, I'm all about rolling myself, and I've been doing a lot of rolling lately in my Squeedunk Cormorant and Valley Nordkapp so I'm stoked (euphemism for "summer has arrived here in Texas").

I want a low aft deck for rolling.....

Plus, in my experience the coaming takes the most ferocious beating of any part of the boat outside of the "landing gear" ..... the keel line and stem areas. I'm forever having to patch the 'glass, re-poxy, etc., etc., from my incessant use of a tight-fitting neoprene skirt.

So.....


I refer once again to Vaclav's most excellent One Ocean Kayaks web site, and produce this carbon fiber and fiberglass coaming rim. I much prefer the look and lighter weight of the wood rim, but I want this boat to be functional first and foremost.


I also don't mind hiding that riser a little. So there. This is starting to work.


I don't go into detail on how this, and the hatch gasket channel sills, are made because Vaclav covers it on his site; but I will go ahead and show the following because it worked so beautifully: The minicell foam mold for the lay-up (as gleaned from Vaclav, I'm only emphasizing it here).

You're looking at about a seven- foot-long strip of minicell that's 5/8" thick x 1 1/4" wide wrapped around the coaming riser and taped into position with plain ol' (wide) masking tape. Minicell is not inexpensive, but this little gem requires surprisingly little of it, and I'm careful to use the parts that have the hardened, almost glazed, surfaces that you normally grind off; they'll help make the masking tape release easier, and waste is nicely minimized. The strip is made up of several shorter section glued end-to-end with contact cement. As you can see, it conforms perfectly to all curves and bends. Yes, that's bare, unadorned minicell you're looking at under the masking tape.

Aaah, minicell and beer -- proof there is a loving God in heaven.

Can't wait to show you the finished rim, it looks killer! And this coming from the guy who bemoans carbon fiber stuff on wood boats. But it came out so well it's getting me excited. Funny thing, 'getting excited' used to mean that I'd bang out the project in a headlong rush and splash it just as quickly as humanly possible, and now it's more like "okay, I guess I'll get off my butt now...." I guess that's what more age and a lot of finished boats does for a guy. Mellows him right out, it does.


Here's something I've been wanting to try ever since I bought my fiberglass Valley Nordkapp: make a bulkhead out of fiberglass matting, and nothing more (well, other than a little epoxy, maybe). It's pretty cool, actually; transluscent as a bathroom window, and ought to be pretty light weight......?


I had already made a couple strip-and-fiberglass bulkheads to be sure I was covered, and this gave me an opportunity to check the weight thing.

Wood bulkhead: 6.8 oz.

Mat bulkhead: 3.5 oz.

Bingo! I can add a cool little feature to the boat, and get back a little of the weight I put in when I did the carbon fiber coaming rim, which is not as light as the wooden one, but was adopted for its superior durability.

The rear bulkhead is kept as is because it needs to be strong. The Outer Island has a rear deck that's flat as a fritter, which is great for rolling and self-rescue fun, but not inherently strong like an arched, or cambered, shape would be. Or in other words, it just flat needs help ..... and it's gonna get it, too, in the form of this wooden bulkhead you see here.


Here, we're installing the aft hatch gasket channel sill. I only show this because I get endless kicks out of how funny clamp clusters end up looking sometimes.

If you look closely, you might notice a couple of the clamps have bits of scrap cedar strip acting as pressure pads. In this case, the gasket sills have been laid up with fiberglass and kevlar, so they're transparent enough to plainly show what the glue (epoxy with Cab-O-Sil) beneath is doing, a rare luxury to get as a woodworker. The wood pads were added to drive out the last of the bubbles. I can only hope to goodness I got these babies right, because they're now glued in place for all eternity.


I seriously doubt it'll be long before the next update to this little presentation. I've got to get this boat FINISHED. It's May 23, 2010 as I post this, and the Mess-a-Bash will be June 26. What's a Mess-a-Bash? Why, JUST CLICK HERE.


Rewind to Home Page

Rewind to Page 2

Rewind to Page 3

Rewind to Page 4

Rewind to Page 5

Rewind to Page 6

You Are Here: Page 7

Fast Forward to Page 8

Fast Forward to Page 9