The Sawdust Factory Presents
Page 3
In vintage aircraft restoration, there's a term that's used when a big nasty project approaches the completion deadline: "It's the dreaded moment when 95% is done, and 50% is left to go."
And that's where we pick up here on Page 3. I've glassed the interior, and been working on a bunch of other junk that'll have to be addressed sooner or later. Thwarts and decks and gunnels; a seating arrangement, that sort of stuff.
|
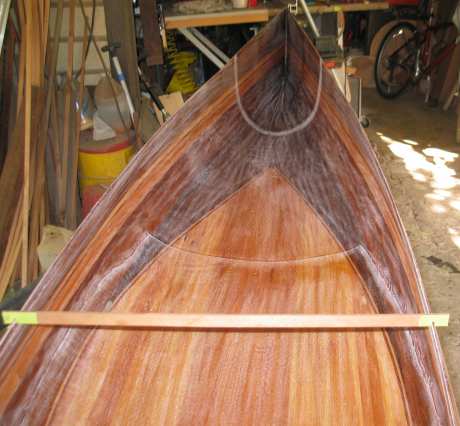
Note the spreader stick, one of several. A word to the wise: use 'em. The basic lay-up I used is 4-oz inside and out, with 6-oz over the football outside, and covering the "occupied territory" inside. When laying in the 4-oz, I do the last 30" of either end separately, to keep the stress level under control. It worked well. I've hit the glass with coarse sandpaper, which whitens the edges of the cloth layers nicely for this illustration. I always hit the cured saturation coat with 60-grit to prep for the first fill coat. By hand. The cloth has very little protection at this point, and a power sander will have you into it in no time flat. I consider sanding essential, to accomplish several things: it causes to me eyeball every square inch of the wet-out for any stupid stuff in the goo, like stray fuzzy strands or gnats or whatever; it highlights high and low spots; perhaps most importantly, it lets me know where I've been and where I need to go when applying the fill coat. I always sand between coats of pretty much anything I apply for that last reason alone, if for no other. |
 |
 |
Here's another one of those silly little shop-made tools
that really pays big time: The flush trimming knife.
I've glued a utility razor blade to a piece of scrap from off the floor with super glue and a shot of kicker. Heh, instant gratification for the guy who spends a couple months building a boat. And now I don't have to FUBAR a fillet knife to trim excess cloth. I'm so brilliant. |
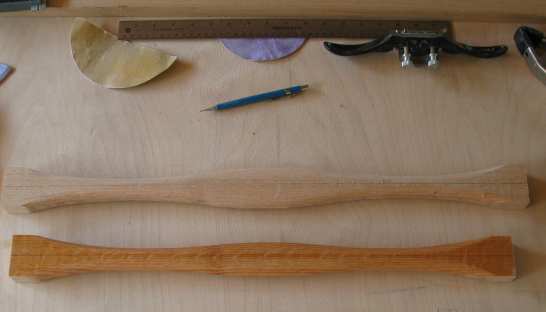
| I'm really liking this part of canoe building. To wit: I
get pretty tired of fiberglass and epoxy after just a short while,
since I'm a woodworker at heart; so attacking the erstwhile fussy little
details like these turn into very welcome diversions indeed.
Especially since they're fashioned in classic hardwoods, which I seldom allow myself to use in my obsessive quest for lightest weight. I love cedar to no end, mind you, but by golly it's great to be working with oak and cherry and mahogany! The thwarts simply must be stronger than cedar can deliver. And the decks, well, they're like hood ornaments in the classic wooden boat world. A price I'm willing to pay. The thwarts are quarter-sawn red oak, and the decks are cherry and mahogany. And yes, they're gracefully cambered. These decks turn out to be practice pieces, by the way. The grain's going in the wrong direction. I want it to taper to the pointy end. Hint: you'll NEVER stop goofing up in woodworking. Never. Ever. |
|
|
Next on the agenda is the seat.
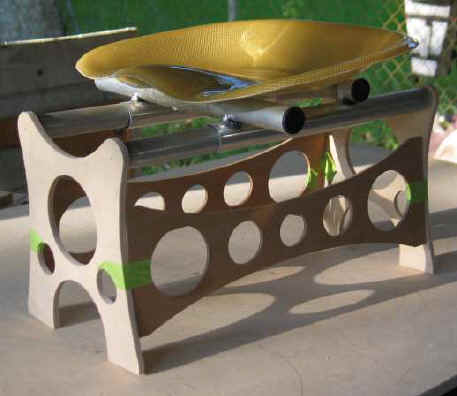
I was never too wild about hanging seats off the gunnels, just something about it I don't like. I like it even less when it's a sliding seat arrangement. And I definitely want an adjustable seat. So... ...In a stroke of propitiously excellent timing, my friend and mentor Bryan fetches home a Wenonah Advantage, and I get to try on for size. Love the pedestal; love the whole damn boat, actually, and offer to trade it for a half-done wooden canoe but the offer is rejected. Looks like I'll have to make something very much like it for my Merlin. I'm also partial to the plastic Wenonah bucket seat as exceedingly comfortable, but accept the offer of Bryan's kevlar Wenonah specimen instead. He bought it, but doesn't like it because it doesn't fit him. Hope it works for me. Looks cool, anyway. Behold the result of a couple hours worth of tinkering: the MK I Prototype Homemade Adjustable Canoe Seat Pedestal. The ends are 6mm Baltic birch plywood, the sides are 4mm okoume plywood. As always, I am obsessive in keeping weight down, otherwise this would be a simple thing to design. I have no idea if it'll fly as it sits now, but I think it looks kind of cool. |
Well, that was fun. I threw practically all the stuff I just showed you into the trash can. I had been valiantly endeavoring to use what woods I had on hand, but ended up fighting unsuitable species until I could take no more. So I gave in and made the trek through the big city to Houston Hardwoods. Spent more than I meant to, but came home with all sorts of shop candy. Hot dog, it's such great fun to work with really cool expensive wood!
| I had a bunch of new crud to write about and show, but got
busy doing other stuff and fell behind, and now I'm doing a lousy job of
keeping up with the ol' web page. Oh well, maybe I'll back track and add
some items later.
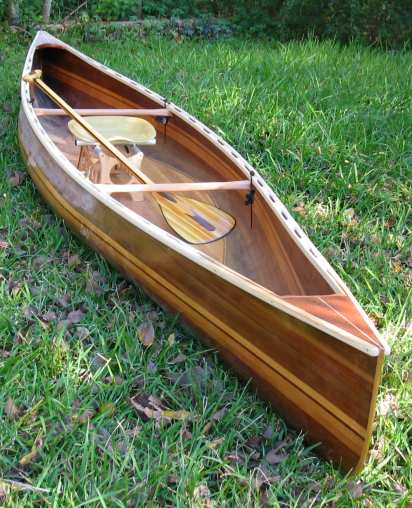
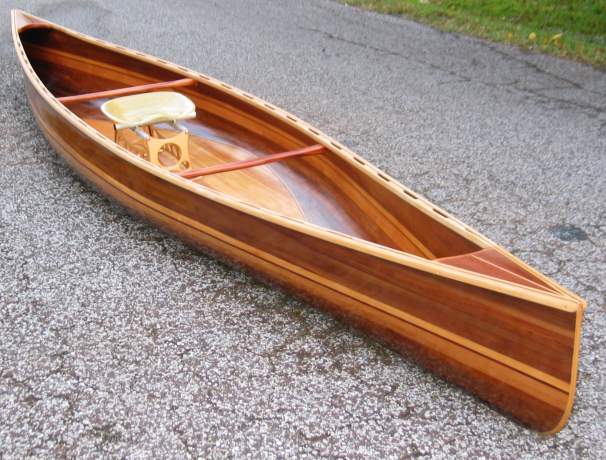
So taking a leap ahead, I fitted all the new parts to the hull and ended up with this: another one of those magic moments in boat building. This one's where you get your first peek at what it's going to look like for real, with only minimal clamping still necessary to hold it all together while you can stand back and gaze lovingly (read: wish like hell you were done so you could go paddling). About a week and a half to launch at this point. Check out that homemade paddle, will you? About 12 ounces. I'll have to talk about my paddle building adventures one of these days... |
|
|
|
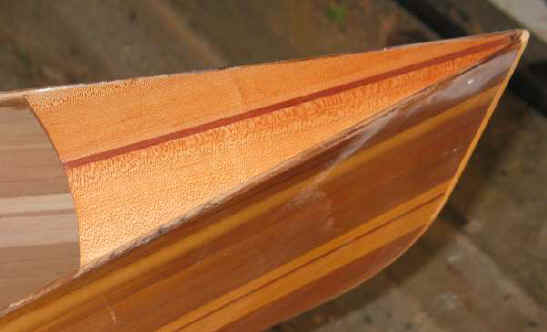
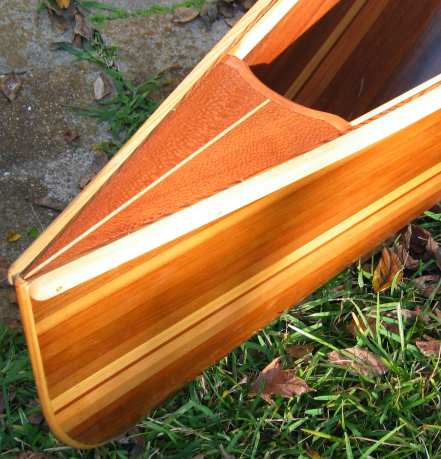
Close up of the bow. The gunwales are cypress. The decks
are built-up composites of lacewood, basswood, and mahogany; they're
lightweight yet hard as iron, subtlety cambered, and feature ergonomic
shape underneath to give fingers a comfortable and secure grip when
carrying.
Hey, if someone's going to be kind enough to help me tote my boat, the least I can do is make it as pleasurable as possible for them. Not that I'll need a lot of help carrying this incredible hulk. She dents the earth at a whopping 33.5 lbs, and I expect no more than another quarter pound to be added, if that. It's a tad heavier than I had hoped to see, but I'm plenty happy just the same; she features a robust lay-up that ought to prove plenty strong for her role as a fishing boat that I'll be standing up in routinely. |
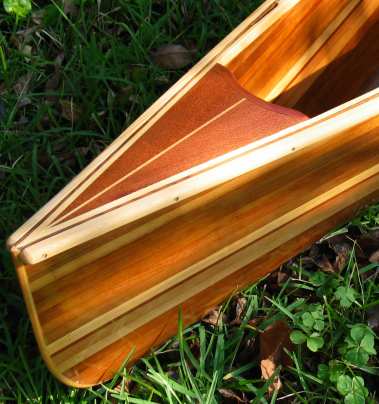
| It was a painful thing to do when so near the end, but I
just didn't like the way my fancy-dan decks looked when bolted straight
to the hull, as in that last picture. That stripe down the middle looked
orphaned, somehow. I was also unhappy with the way the inwales
"died" into the decks; it didn't look right either...
...So I took it all apart, and spliced new ends to my inwales (after briefly considering making new ones), and ran 'em all the way to the ends of the hull. Re- fitted the decks, and bango, a 100% improvement. I can sleep at night once again. ...Except now I wish I had used basswood instead of mahogany for the deck hand-hold ends... that would look cool. |
 |
 |
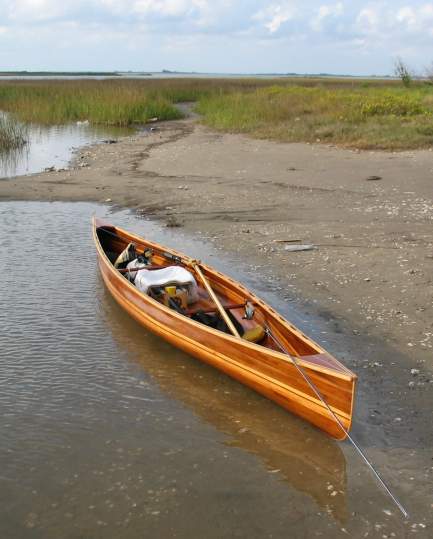
And here she is once again, this time roughly 99.92475%
ready for launching.
There are still a few minor things to attend to, mostly having to do with making sure all raw wood (where holes have been drilled) has been duly and properly sealed. We involved the digital shipping scale again, and this time got a value of 33 pounds on the button. Needless to say, mysteriously losing that half pound didn't break any hearts around here. |
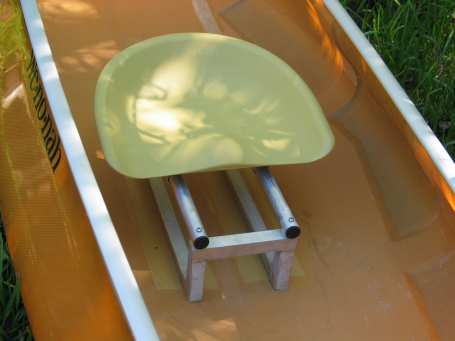
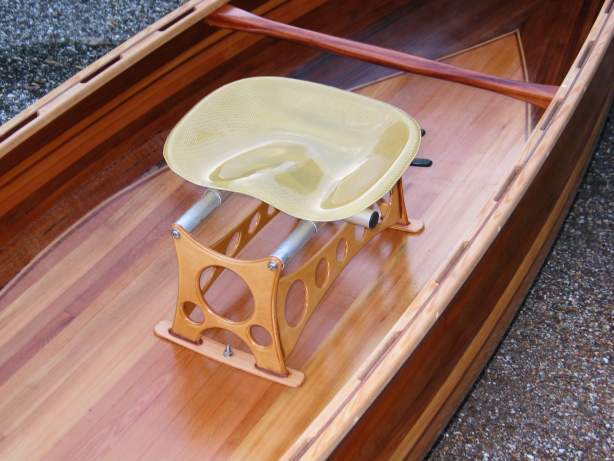
| Here's how the pedestal ended up looking.
12mm and 6mm Baltic birch plywood, and laminated cedar mounting pads. I'm guessing you know aluminum tubing when you see it. Seat height at the front is 10". Feels kind of high in the ol' front yard sit test, but then, I like getting high once in a while. Just kidding, the seventies were a long time ago. But it will definitely be super duper nice to have the advantage after years in kayaks with eyeballs only 26" off the water. I have no idea if this sucker's going to work well or not, but I do know one really good way to find out... |
 |
|
|
| She was launched on November 19, 2007, and we completed a four mile voyage on familiar waters as a start. No funny business sprang up, so the next day we went fishing in Drum Bay, just down the coast from Galveston. The seat height is just fine as is, and she's stable enough to stand up in, and cast an 8-weight fly rod wildly (which is how I normally cast flies) even in mild chop. It was pure luxury to have an amply sized cooler along -- and one that's actually readily accessible at that. I tested it out by adding a couple speckled trout for the evening's dinner. And that's how you break in a fishing boat. |
|
|
|
Next fishing trip was even better. Looks like I'm going to be having some FUN with this boat! |

Return to The Merlin Start Page
Return to Page 2
Forward to Page 4