The Sawdust Factory Presents
Micro Aquariums & Stereo Microscopes
- Plus -
A Homemade Slide Ringing Table
Part 1: Observing Protists In A More Natural Way
To start, let me very enthusiastically say that if you enjoy observing pond life through the microscope, you owe it to yourself to try it with a stereo scope, aka "dissecting scope", if you haven't already. The ability to study wee critters in a more natural habitat, get wider field of view and the perspective it gives you, and true 3-D visual depth are all worth the price of admission all by themselves. But getting a handle on true physical sizes of your subjects is perhaps the most amazing part of all. Why, you may very well learn to spot many "microscopic" organisms with the unaided eye alone, as I certainly have.
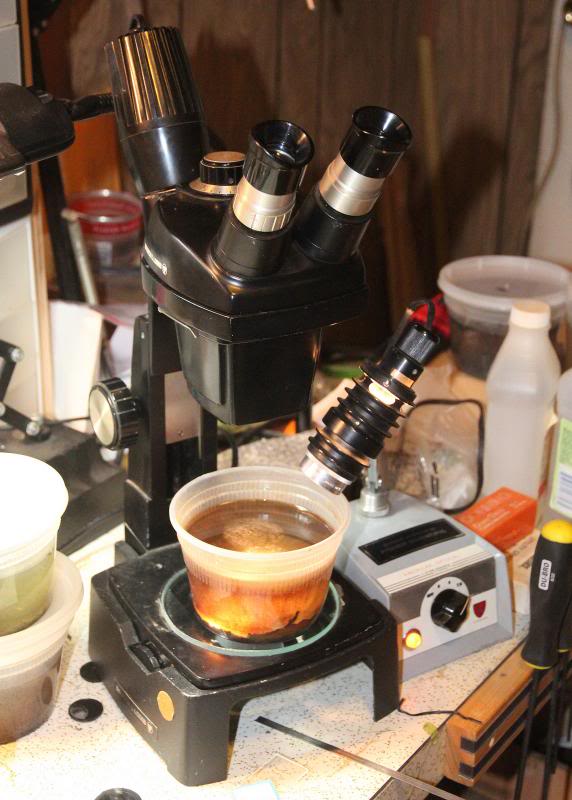
Here's where it began (for me): my old friend the B&L Stereo Zoom and a
sample container fresh from a local pond. I soon developed a routine habit of examining samples
under the stereo scope before proceeding to the compound scope.
And lately, it seems I spend more time gazing into sample containers through
lower powered stereo scopes than examining wet mount slides under the "big
eye".
Some time later I was surfing the net for microscope stuff, and ran across a picture picture of a gentleman peering into a micro size aquarium with a stereo scope head mounted on a lab jack
plate. Too bad I didn't save it, can't find it now. Anyway, it piqued my interest in a big way, and I
simply couldn't put it out of my mind until I had
something similar. I was sure it would be worth it, and I was not mistaken!
I made my micro-quariums out of glass scraps I had on hand and tubes of silicone obtained from the local hardware store. If you have never cut glass before, cutting tools are also to be found at the hardware store and directions are easily had on Youtube. The store also sells window glass, so everything needed to get started is handily available in just one place.
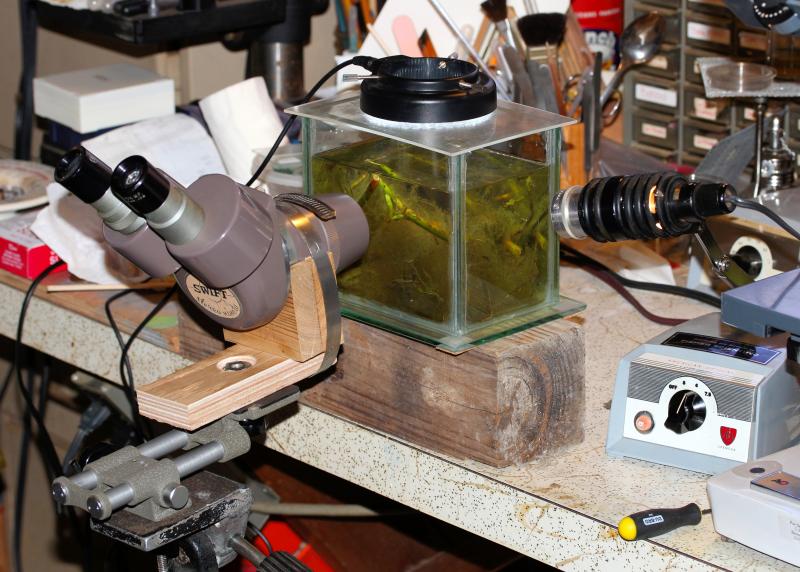
The stereo scope pictured above is a ridiculously inexpensive vintage student grade instrument purchased thru eBay. The adapter to photo tripod is obviously homemade, and the only real luxury item I indulged in is the focusing rail intended for macro photography. And even it was reasonably priced (said the patient eBay watcher).
One of these days I'll switch to a lab jack for the stereo scope and eliminate the tripod. Not sure what I'll do for focusing, but probably simply scoot the jack by hand. Stereo scopes are forgiving enough to get away with just about anything, yet another reason to love 'em!
Incidentally, the LED light ring for stereo microscopes that is pulling double duty as a miniature aquarium light was purchased off eBay for ~$20, and has been a splendid investment.
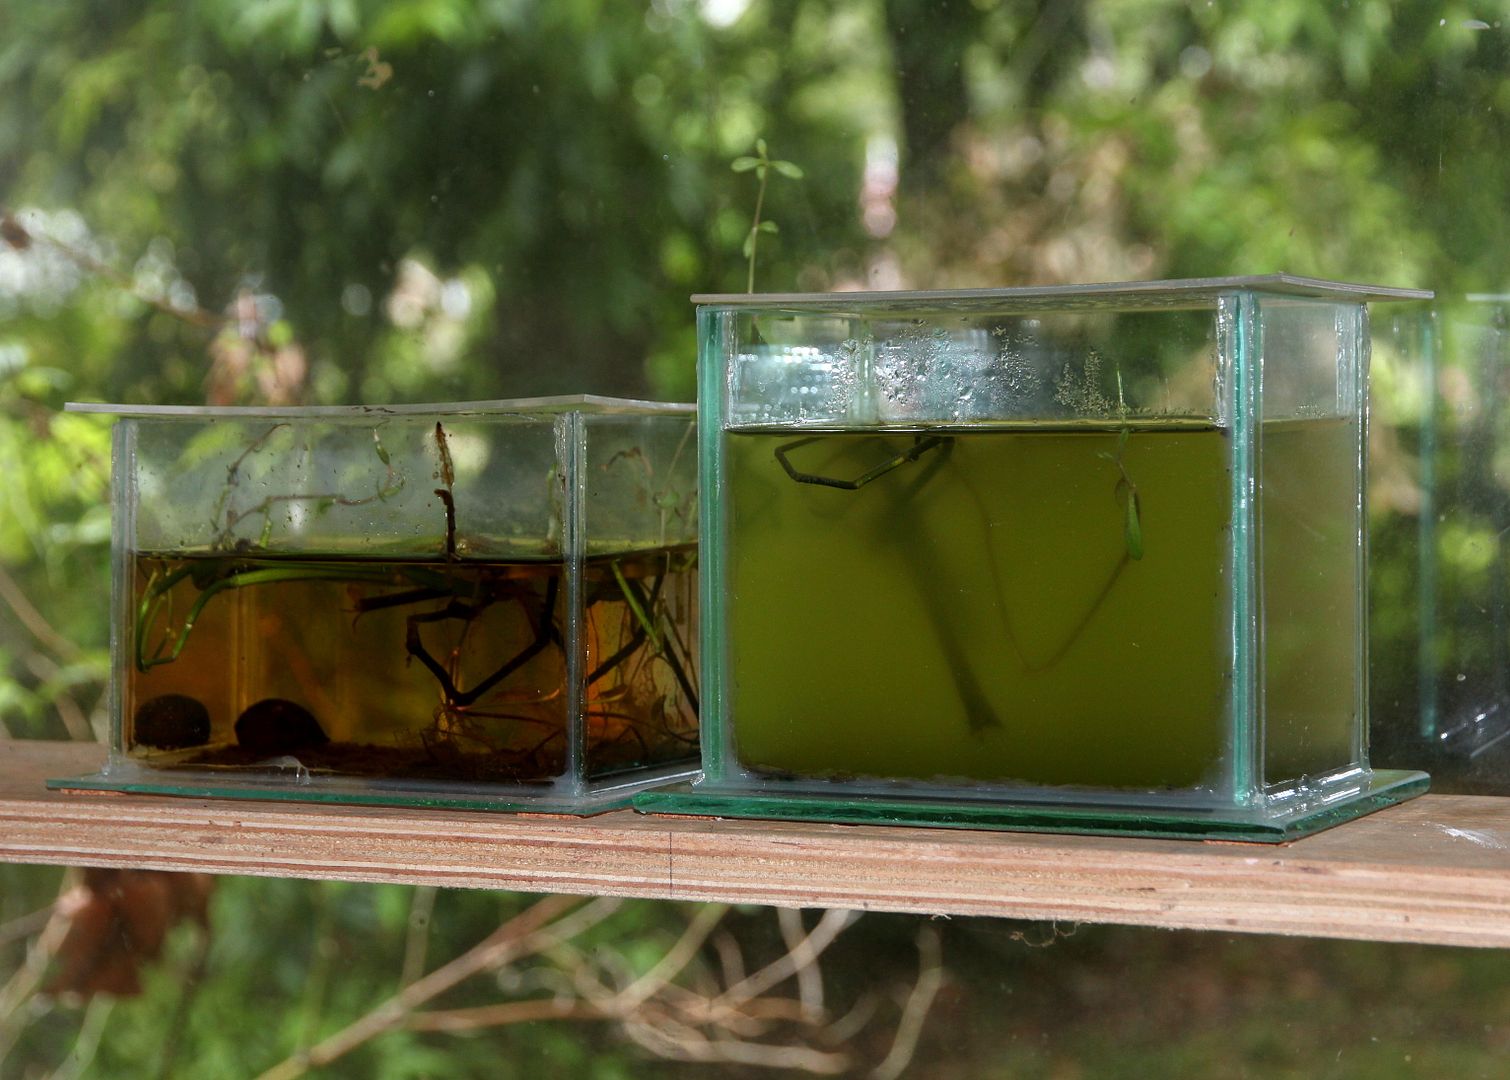
Above: One micro-quarium with a long-established hydra colony, and a newly collected sample settling out.
Managing micro-quariums is simplicity itself; there are no filters, aeration devices, or any of the complications found in "fish tanks". They're merely oversized sample containers, and treated as such. Well, except that it pays to keep the glass clean, since that's the whole point of this exercise. Incidentally, I have learned to keep all of my pond water sample containers stored in a window that receives little, if any, direct sunlight, and have built shelves for the purpose (yes, it helps to be a bachelor!).
So what is there to see with this rig? Check out my Flickr album of macro photos and see for yourself: My Flickr Album
Part 2: How A Rank Amateur Makes Professional Looking Slides
In other internet wanderings I would occasionally run across antique Victorian-era slides (click HERE), and there was something about those circular cover slips ringed with black cement I found fascinating. How did they do that? A bit of Google work turned up this very interesting article on Micscape. Then a quick search on good old Youtube showed exactly how slide ringing tables work. I just had to have a go at it, my homemade device turned out great, and ringing slides is fun and easy to do.
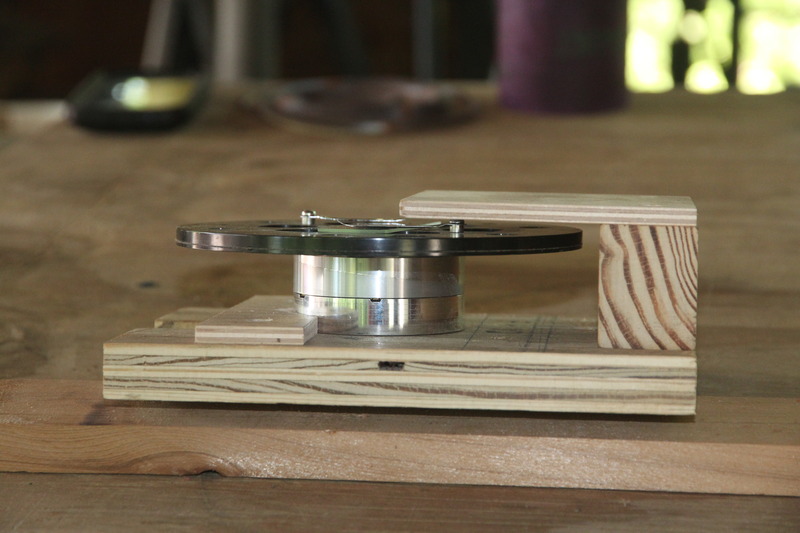
Above: So here's the prototype. Ingredients include small bits of scrap lumber from the trash can, the head from a dead VCR (obtained free for the asking at a local TV repair shop), a spare base plate from a Porter-Cable 690 router, and stage clips from a toy microscope.
I get spin times of around 30 seconds without trying too hard, which is amply sufficient. I am told by an overseas correspondent that the newest model store-bought version from Brunel spins longer, and that the older, discontinued one, a good deal less.

And here it is fully developed, such as it is. A scrap of paper was taped to the turntable, and centering marks for positioning slides added. Yes, I believe a rebuild is in order to "pretty it up", but in truth it's not real high on my list of priorities since it works so well just as it is.
To use, clip the slide in place on the turntable using the marks to center it. Then load a paintbrush with your cement of choice. Flick the table to a spin, use the overhanging hand rest to steady the brush, and apply the cement - it's just that simple. Brunel ringing cement, as seen in the picture above, may be used, or you can experiment with model enamels and acrylics, fingernail polish, or whatever strikes your fancy. No, I have not found the perfect ringing cement yet, so if you do I hope you'll let me know about it (email addy below).
A slide ringing table comes in handy for other uses as well: for initial slide preparation to get cover slips centered perfectly on the slide, and to make dark field masks among other things. In short, it gets used a lot more often than I ever thought it would, a very handy bit of lab gear.
Note: On the Youtube video the narrator says it's necessary to carefully center the cover slip on the slide for this to work. Beg pardon, but I must differ, sir; as long as the cover slip is centered on the table, where the rest of the slide lays is irrelevant (as I learned from experience). In fact, I have yet to get a cover slip centered perfectly. Getting them at least roughly centered certainly makes the results look nicer, and labeling easier, but I have not found slide ringing to be an overly fussy or tedious operation.
Micscape article: A Slide Ringer made from a Discarded VCR
A Commercially Made One By Brunel (UK): Scroll Down a Way
And don't miss "A Cabinet Of Curiosities" at Victorian Microscope Slides.com
My Photobucket Album of Microscopy Stuff
To The Sawdust Factory Home Page
Email Kurt Maurer at NGC704@aol.com