The Sawdust Factory Presents
This Old Kayak
Breathing New Life Into An Old Friend - Twice!
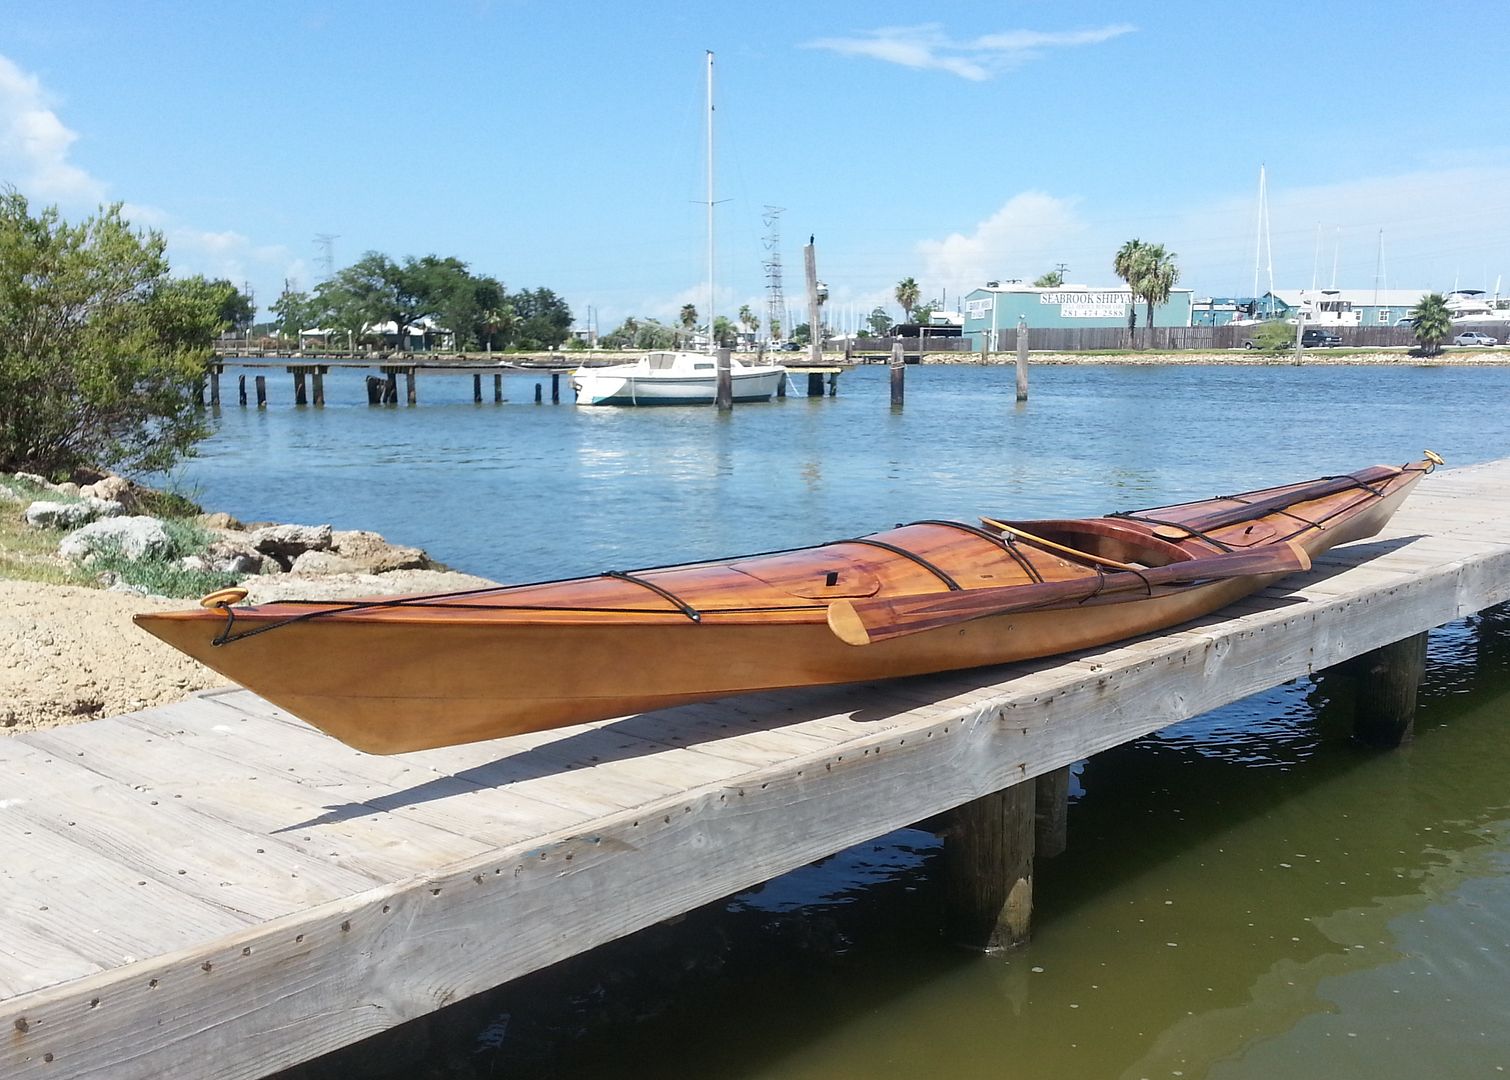
This is a 2 part article featuring two separate rework surgeries performed on my great old Cormorant in the course of ten years of service. Part 1 concerns a major cockpit remodel done a while back, and Part 2 is a more recent total inside-out makeover where I cut the deck off the hull, modify & repair, and put it all back together again with results seen here:
Brief description and history of the patient: The Squeedunk Kayaks Cormorant 16, my third homemade boat project, was built in the winter of 2003. Derived from a table of offsets found on the internet, it was the first sea kayak I ever got in, although it started out configured as a recreational kayak. I soon became hot to learn genuine sea kayak handling skills pretty much in self defense, to keep this spirited steed "hole-side-up". This led directly to my becoming a diehard sea kayak enthusiast, rolling freak, and general Greenland style paddle nut, which has been a huge part on my life for the past decade, so I feel particularly sentimental towards this boat. It was 16'-1" x 22 1/2" before the last rebuild, is now 16'-1" x 20", and sports deeper Vee bottom than is commonly seen on kayaks.
It is a very fun design with no bad habits; it's very fast, very seaworthy, and tippy as hell. But while primary stability is practically non-existent, secondary stability is rock-solid, and all of these traits - quirks? attributes? - come together to make the Cormy a wonderful kayak to learn in. I absolutely love with the way this boat handles!
I live on Upper Galveston Bay, and paddle sea kayaks almost every day for two-thirds of the year. With them I do lots of fitness paddling, rolling, touring, and fishing, and they tend to live on the racks for months on end. All this means that my boats get a little frazzled looking late in the season, so part of the latest rebuild was to make refinish work easier also.
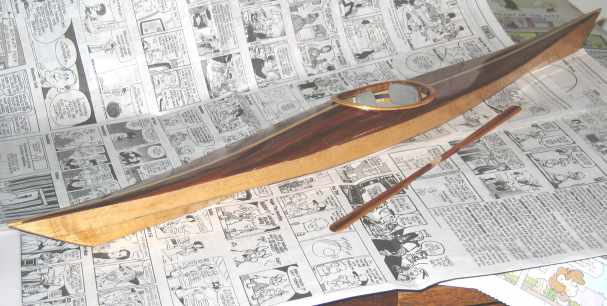
But before I get into the rebuild, here's a scale model of this kayak I built. This little dude is built just like the original, even made of scrap materials from the original. It's 1:8 scale, measures 24" LOA, and sports a fully outfitted cockpit complete with carved minicell seat and articulating backrest per the original (though I no longer use back rests). It is fully 'glassed using 3.5-oz fine weave cloth from Raka. The laminated Greenland Paddle is also a 1:8 scale replica of my full size paddle. I use this model for teaching rolling, got the idea from my friend John Caldeira.
|
|
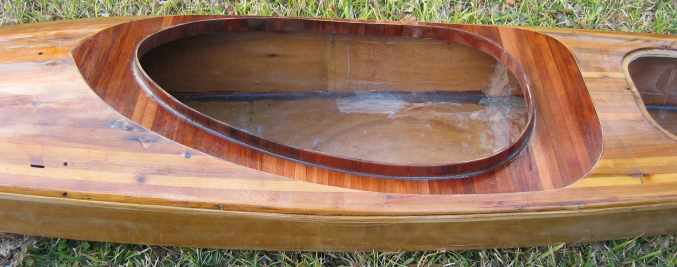
Part 1: Completed in the summer of 2005, the oversized recreational-style cockpit hole was transformed into a snugger sea kayak style with recessed coaming. The aim was to make the boat better suited to rolling, although I gotta say I originally learned to roll in this boat just as it was.
In rework projects, the opening salvo is pretty much always the same: Get out the jigsaw, and make the sawdust fly!
Yes, it is a very disturbing thing to do to an old friend, but then, nobody ever said homemade boats were always going to be warm fuzzy feelings, did they? So RRRRRRR!!! There, now we're committed . . .
 |
I would have taken photos of the rear bulkhead demolition, except that nothing could be seen behind the clouds of dust and smoke after the explosive charges went off. Seriously, the bulkhead was 4 mm okoume installed with rather small thickened epoxy fillets on either side, and no glass. To remove it, I used a cheapie wood chisel and mallet to nibble away the fillets, then a framing hammer to bash the plywood loose when the fillets weakened, and the combined assault carried away bits of hull plywood here and there. So don't bother to glass in your bulkheads, they're plenty strong with just a couple of small fillets, that's my advice.
| Here I have recess and cockpit templates made of scrap FRP commercial wall paneling material that I use in telescope making, which are employed on every kayak I build. Not only do I want to tighten up the cockpit, but I want to lower it too; so we're gonna install a recess, and this is the template for the recess. Since recesses are mostly needed behind you, we're going to locate most of it aft of the paddler's position. Lowering that coaming rim will make layback rolls more . . . well, laid back. | 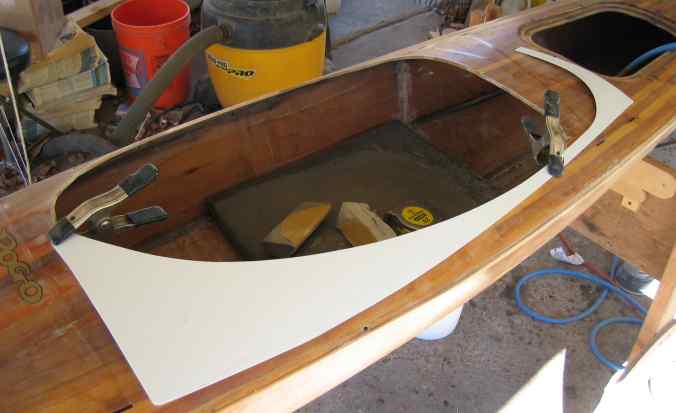 |
| Once the recess has been cut out and
sanded fair, a 1/16"
thick strip of ash is glued around the circumference. It will help fair up
the hole, and end up as
a nice little pinstripe in the final product. Then the recess is begun, but with one
little trick thrown in first...
The aft deck has more arch, or camber, than I want, so I'm gonna flatten that rascal out as much as it allows me to. A scrap piece of stout 3/4" plywood is placed on the deck, and a rig of straps plus 25-lb bag of bird shot completes the picture. With the deck thus mashed flat, two or three recess strips are glued into place to hold 'er there . . . |
 |
|
|
. . . And it works! |
|
Fast Forward -- Presto, a recess! |
 |
|
|
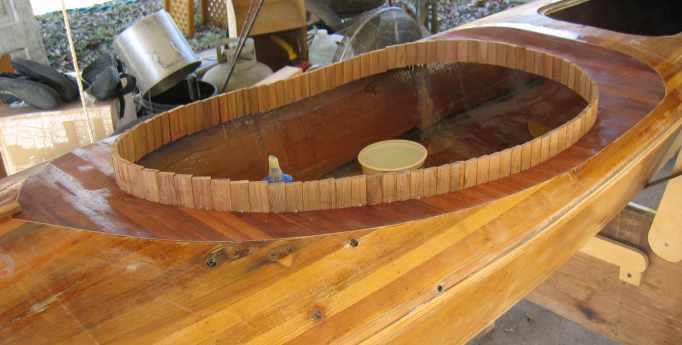
Another wave of the magic wand, and poof!,
a riser appears.
The recess takes three days to put in, and the riser takes three hours. Next project will be the other way around. Beats me why it is, just one of those things. |
|
|
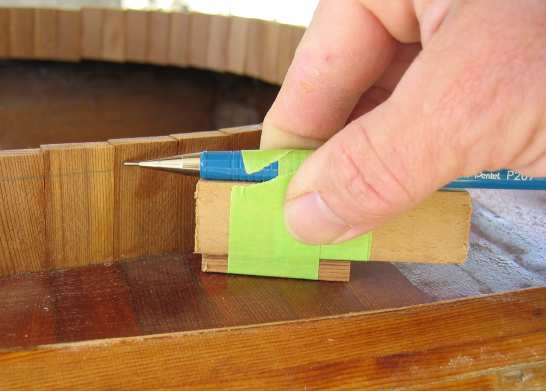
Here, I mark the riser height with a very simple
gauge tool.
Never mind that the pencil point isn't exactly on the line, I'm holding the gage with one hand and taking a picture with the other, and concentrating more on not dropping the camera than holding the gauge, which I fashioned from a mechanical pencil and some scrap in like two minutes. |
It might be worth noting that some builders trim the coaming riser after the rim has been fashioned and installed. I, on the other hand, prefer to "pre-trim" the riser, then build up the rim using the top edge of the riser as a guide. As usual in boat building, there are about a million ways to do any one thing, so do what works best for you.
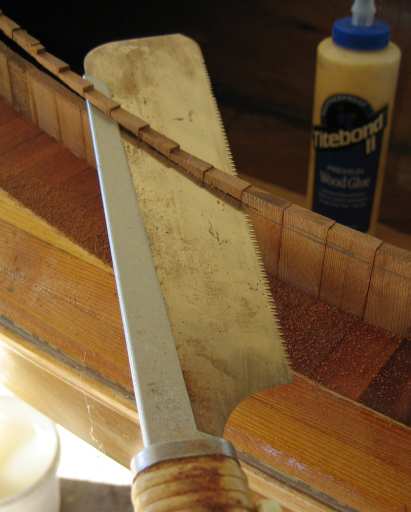
| And here's how we trim a riser. Japanese pull saws are
just the greatest tools ever, highly recommend them.
I used to wonder what in the hell the Japanese knew about woodworking that escaped western civilization for so long, but it turns out they have a few tricks up their kimonos after all. The Japanese Thing is no mere marketing gimmick, and I am now a true believer in these lovely and wonderful pull saws.
When it finally came time to replace a blade in one of them, I turned up THIS OUTFIT, and they quickly became one of my go-to vendors because of their very excellent service and wonderful quality items.
The saw pictured at right is Gyokucho #306. Cuts like a dream. |
 |
|
|
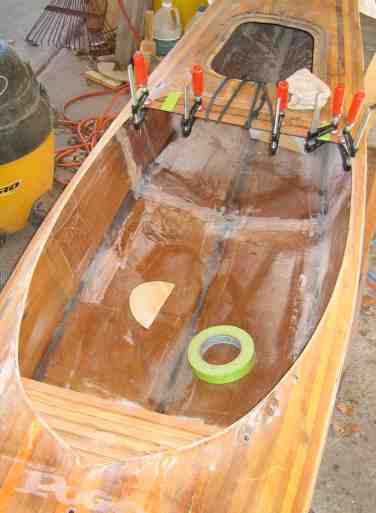
| The recess and riser are 'glassed to the hull on the underside, and all new wood is given a seal coat of epoxy on the outside. Then the riser is filleted to the recess on the exterior, using masking tape to keep it neat, and 'glass is applied to the outside. |
|
|
| The coaming rim was made by using the riser as a mold, and laminating 8 thin strips (1/16" x 5/16") of ash around it, using Titebond II for glue as usual. "Cold molding" this way allows you to pop off the glued-up rim so you can finish out the top and bottom before permanently attaching it to the riser, for a 100% neat, clean, professional installation. The method works great; I've made several rims this way. |
Add a rear bulkhead, slap some varnish on, and we're done! The remodel job is an unmitigated success -- the new cockpit is a vast improvement, works with my spray skirts and rolling technique much much better. This boat has been great otherwise, so this upgrade will really help keep it in circulation for years to come, and is well worth the trouble.
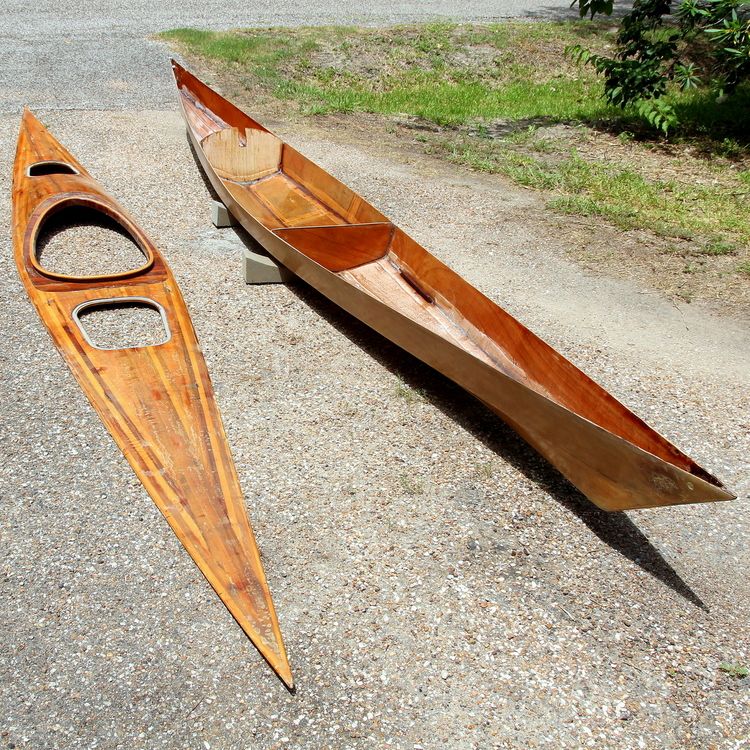
Part 2: As aforementioned, the preceding episode occurred in 2005; and by 2013, the S. S. Cormy had fallen into dusty disuse because the cockpit was just too darn deep, and felt like the coaming was up in my armpits. Rolling was a pain too, with the rear deck way up in the middle of my back, ugh. I had "outgrown" this boat, and it needs to go on a serious diet and lose a few inches in the waist to make it lovable once more.
So out comes the mighty jigsaw once again, and the hull and deck are cut apart. Yes, it is a scary thing . . . but . . . RRRRRRR!!! There, now we're committed . . .
|
|
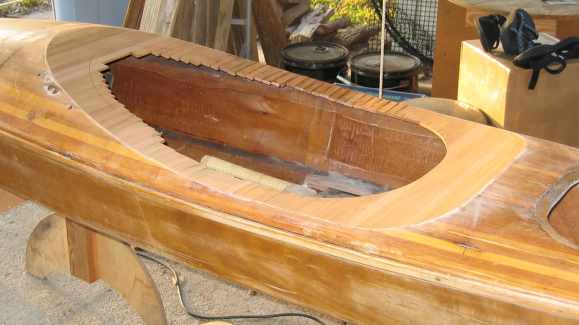
But first, any good surgeon knows one must
map one's proposed incisions. Here we see the Sharpie line before the cutting commenced.
The original build featured decorative rub rails, which are suddenly things of the past thanks to Dr. Chisel and Prof. Mallet, with a mop-up by Col. Sander. The rails looked pretty cool, but were a total PITA at refinish time so they go adios. You can see the ghost on the upper side panel where the port one used to be. |
|
|
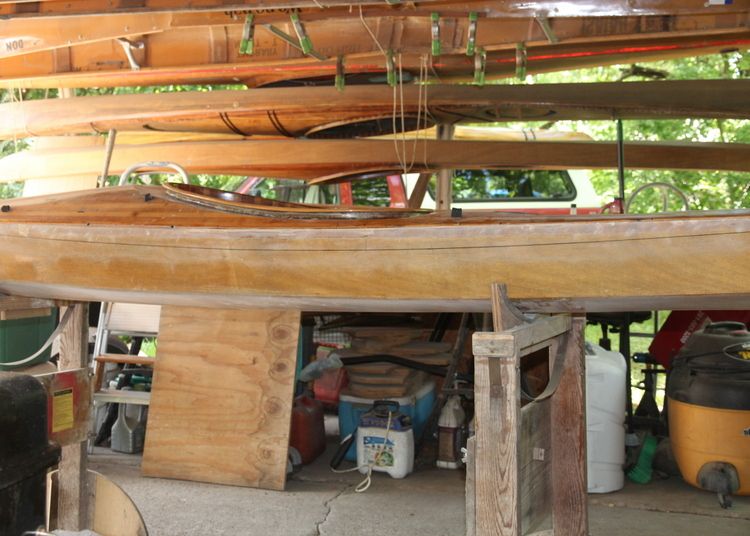
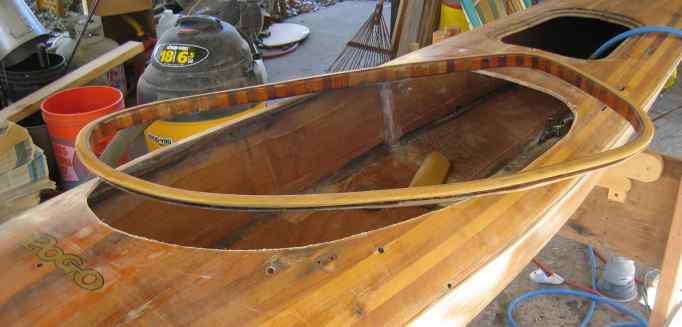
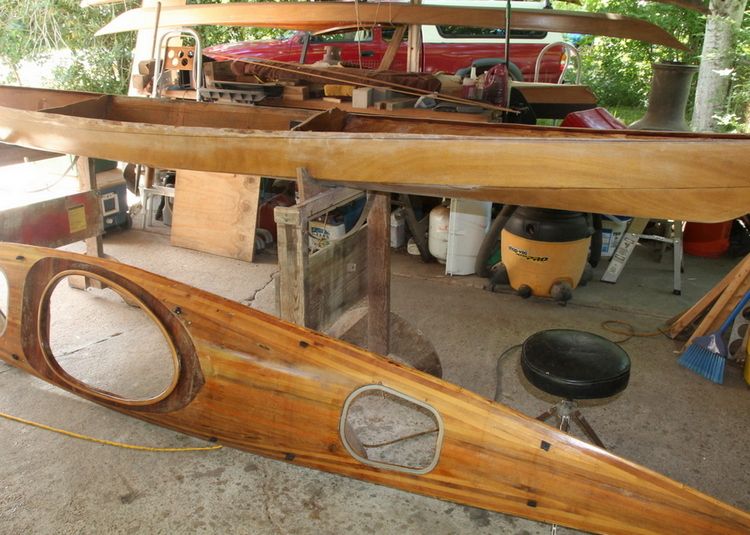
After the deck has been cut off and side
panels trimmed, the deck set back on the hull to see if this is even going
to work.
Oh yes. Why, I believe it will work. And it looks GREAT! Oh, baby. This is much better. Any angst has suddenly become total enthusiasm.
|
| These steps were presented a little out of
order for the purpose of showing before-and-after pictures close together
as seen above, so we can see the effect of lowering the deck most clearly.
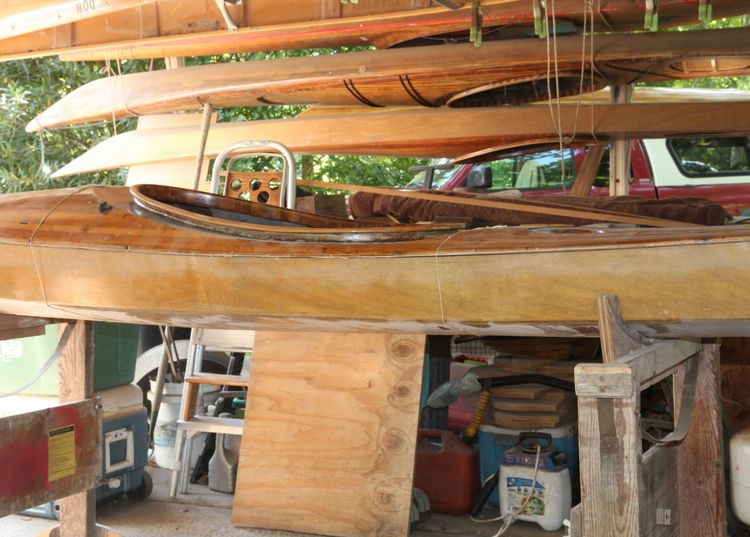
So to back up a bit, here are the two halves as they were seen immediately after cutting apart, and before the hull side panels were trimmed. Although not too terrible, it is still a little worn inside, which is to be more or less expected after ten years of hard use. But no worries -- it's fixin' to get the total TLC treatment from stem to stern. |
 |
|
|
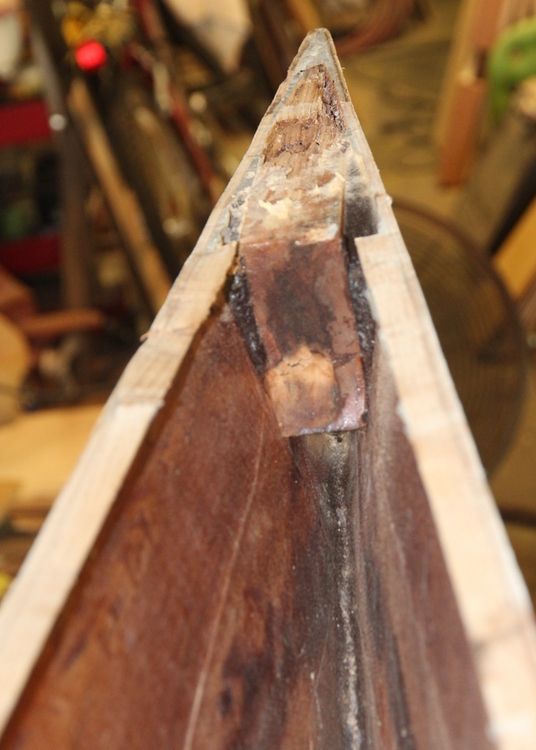
Only one problem was discovered . . . It came as quite a surprise to find that my carved end blocks had rotted through. The erstwhile solid western red cedar 2x4 seen here is soft as a sponge, and can be removed with an ice cream spoon. Guess I won't be using carved blocks any more! But I still don't like end pours, so am keeping my eyes and ears open for a new favorite scheme. For this project, however, I simply cleared all the rotten wood out, made sure the area was well prepared for future use, then reinforced what were once PVC hole liners with thickened epoxy fillets. I have no doubt it'll good enough. Which, come to think of it, I also thought about the carved end blocks once upon a time. Oh well. At least I know how to cut a boat apart, fix it, and put it back together now if I need to. |
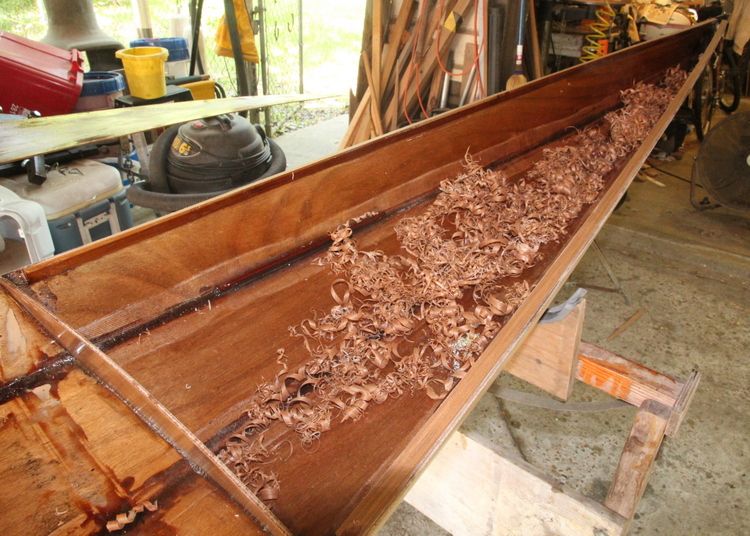
| The interior sides of the hull and deck are all
spruced up, repaired as necessary, thoroughly re-sealed with epoxy, and otherwise made ready to
face many more years of "where the sun don't shine."
I guess I coulda-shoulda taken the picture with the deck upside down so we can see the interior, since that's what we're talking about all, but I guess I ain't that smart. You get what you pay for around here. |
 |
|
|
New sheer clamps are installed, sealed, and planed to shape. Existing bulkheads are still good, don't need to be replaced, only need to be trimmed to new shapes and we're good to go. |
|
When I have done all the damage I can, it is time to "close the clam." |
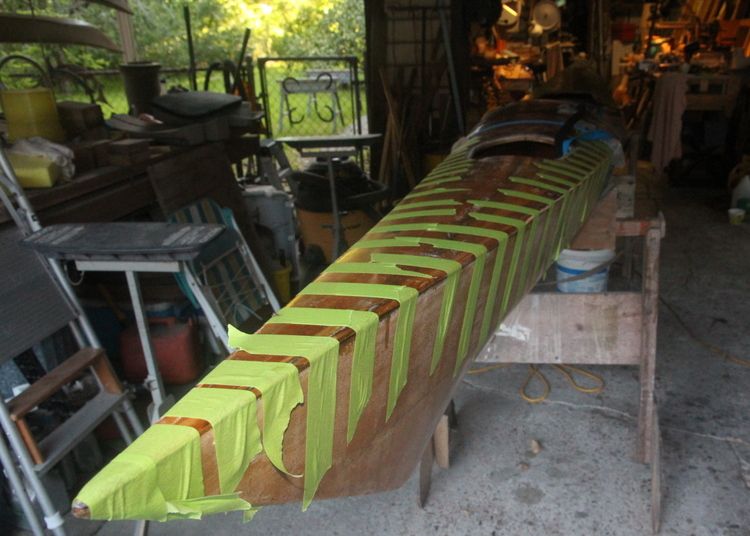 |
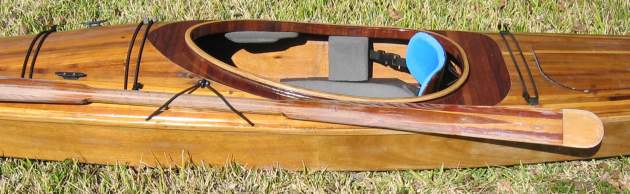
| The exterior is similarly "freshened
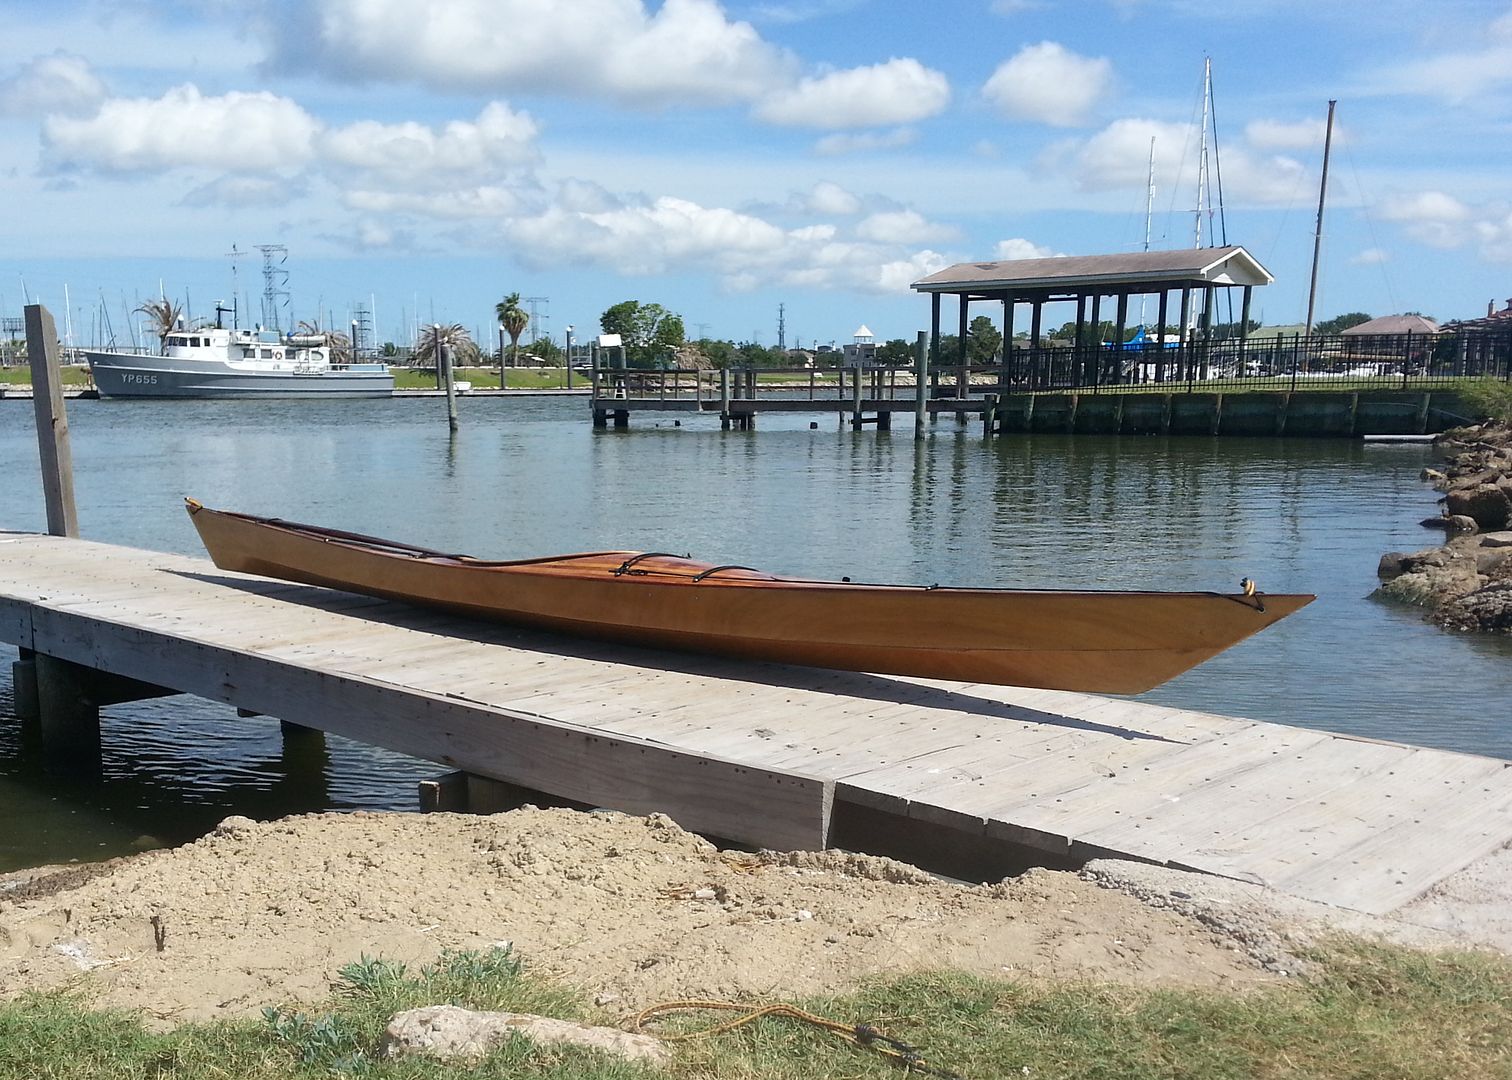
up a bit", given six coats of varnish, and new deck rigging added. Done!
This boat has lost 1 1/2" off the beam (due to the hull flare), a loss of 2" height from the side panels (amidships only), and has even managed to shed 6 pounds. She went in weighing 42, emerged a svelte 36 lbs. Okay, I have to say a word about the weight loss. I have been giving it quite a bit of thought, and the only thing I can think of to account for it is the fact that I used a 4" right-angle grinder more than I care to say to remove any and all excess epoxy from the deck and hull interiors in the course of renewing them. I have said many times that almost all excess weight comes from excess epoxy, and all of a sudden I think I may have a pretty good case study to point at. It's hard to say since I didn't document much of anything, but that's the general drift as far as I know. The excess epoxy was mostly found in the form of pooling, in larger than necessary fillets, in drops of goo that was left where it fell, in runs, and things like that. Typical beginner's stuff, I suppose. All I know is it ain't there now, and neither is 6 pounds, and the boat is still as strong as it ever was.
|
 |
After a few outings, I find that the old trouper still performs as sweet as ever. It always comes as a bit of a pleasant surprise to be reminded of how fast she is for a 16-footer, and how stubbornly she refuses to perl no matter how steep or close-packed the waves and troughs are. I have never seen her bow under water. I was more than a little concerned over whether I left enough buoyancy in the hull after the chop job, but I need not have fretted - there's still a good 2" of freeboard showing with my staggering 160# aboard. The good old Cormy now rolls more like the Outer Island than my Valley Nordkapp LV, which makes me exceedingly happy. I am also delighted to note that no portions of the vessel show any hint of interfering with my forward stroke, which is also a very nice change.
Looking back on it, the project was fairly easy and straightforward, and presented no undue difficulty or tediousness. It went so smoothly that I am now considering cutting my first Outer Island apart, and repairing and restoring its interior so I can return it to front line duty.
Return to the Sawdust Factory Table of Contents
Email Kurt Maurer at NGC704@aol.com